> ## Documentation Index
> Fetch the complete documentation index at: https://kardow.com/docs/llms.txt
> Use this file to discover all available pages before exploring further.
# Login with Google
> Learn how to configure Google OAuth login for your Kardow job board
Kardow supports Sign in with Google and Google's pre-built One Tap button. Google OAuth is one of the most popular login methods because it is pre-filled and simple to use for your users.
## Prerequisites
Before you begin, you'll need to set up a Google Cloud project and configure OAuth credentials:
Google Cloud Platform accountGoogle Cloud project (create new or use existing)Authorized domain configuredOAuth consent screen configured (optional but recommended)
## Create OAuth Credentials in Google Cloud
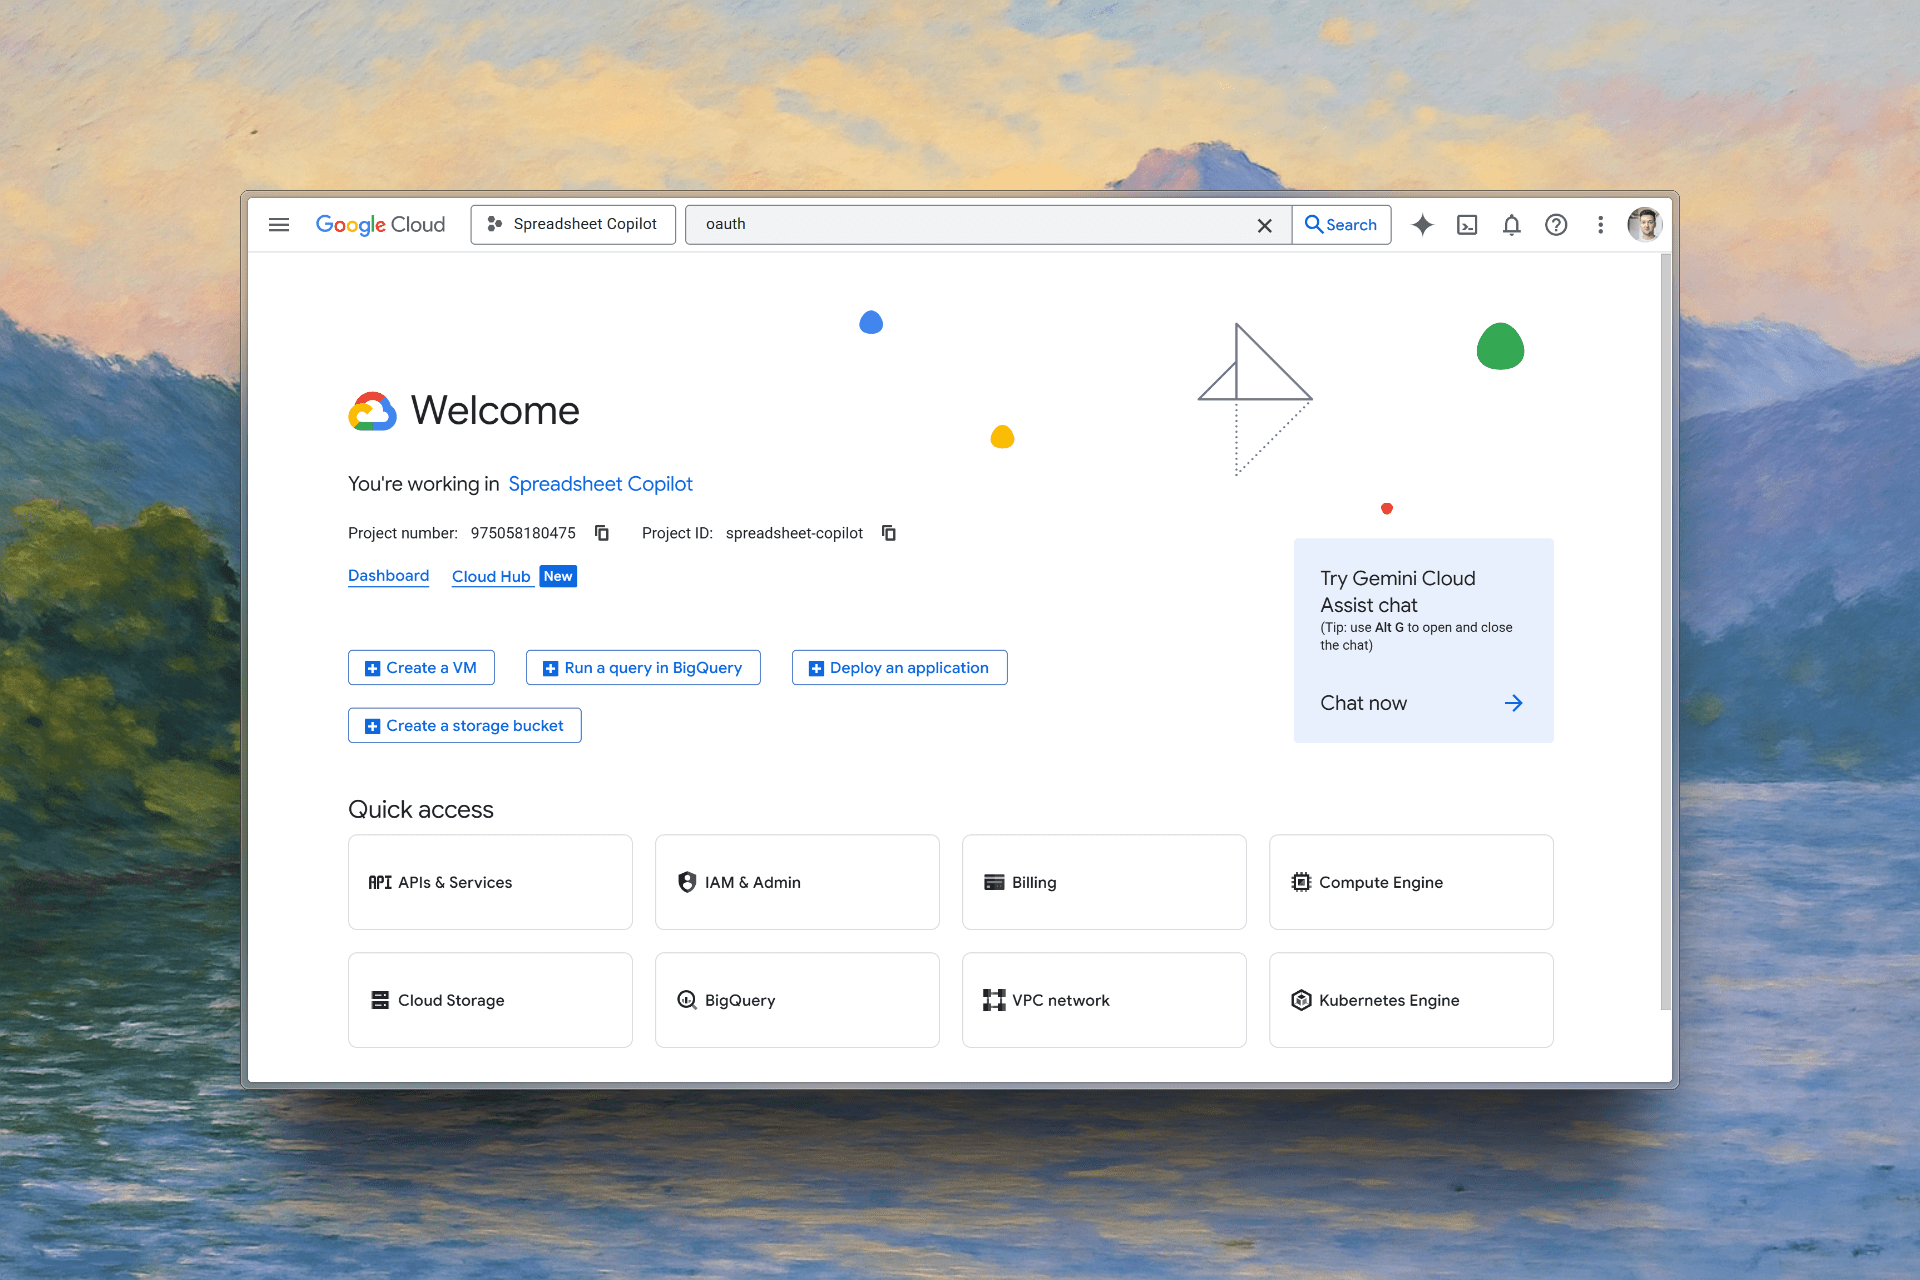
### 1. Access Google Cloud Console
Visit the [Google Cloud Console](https://console.cloud.google.com) and sign in with your Google account.
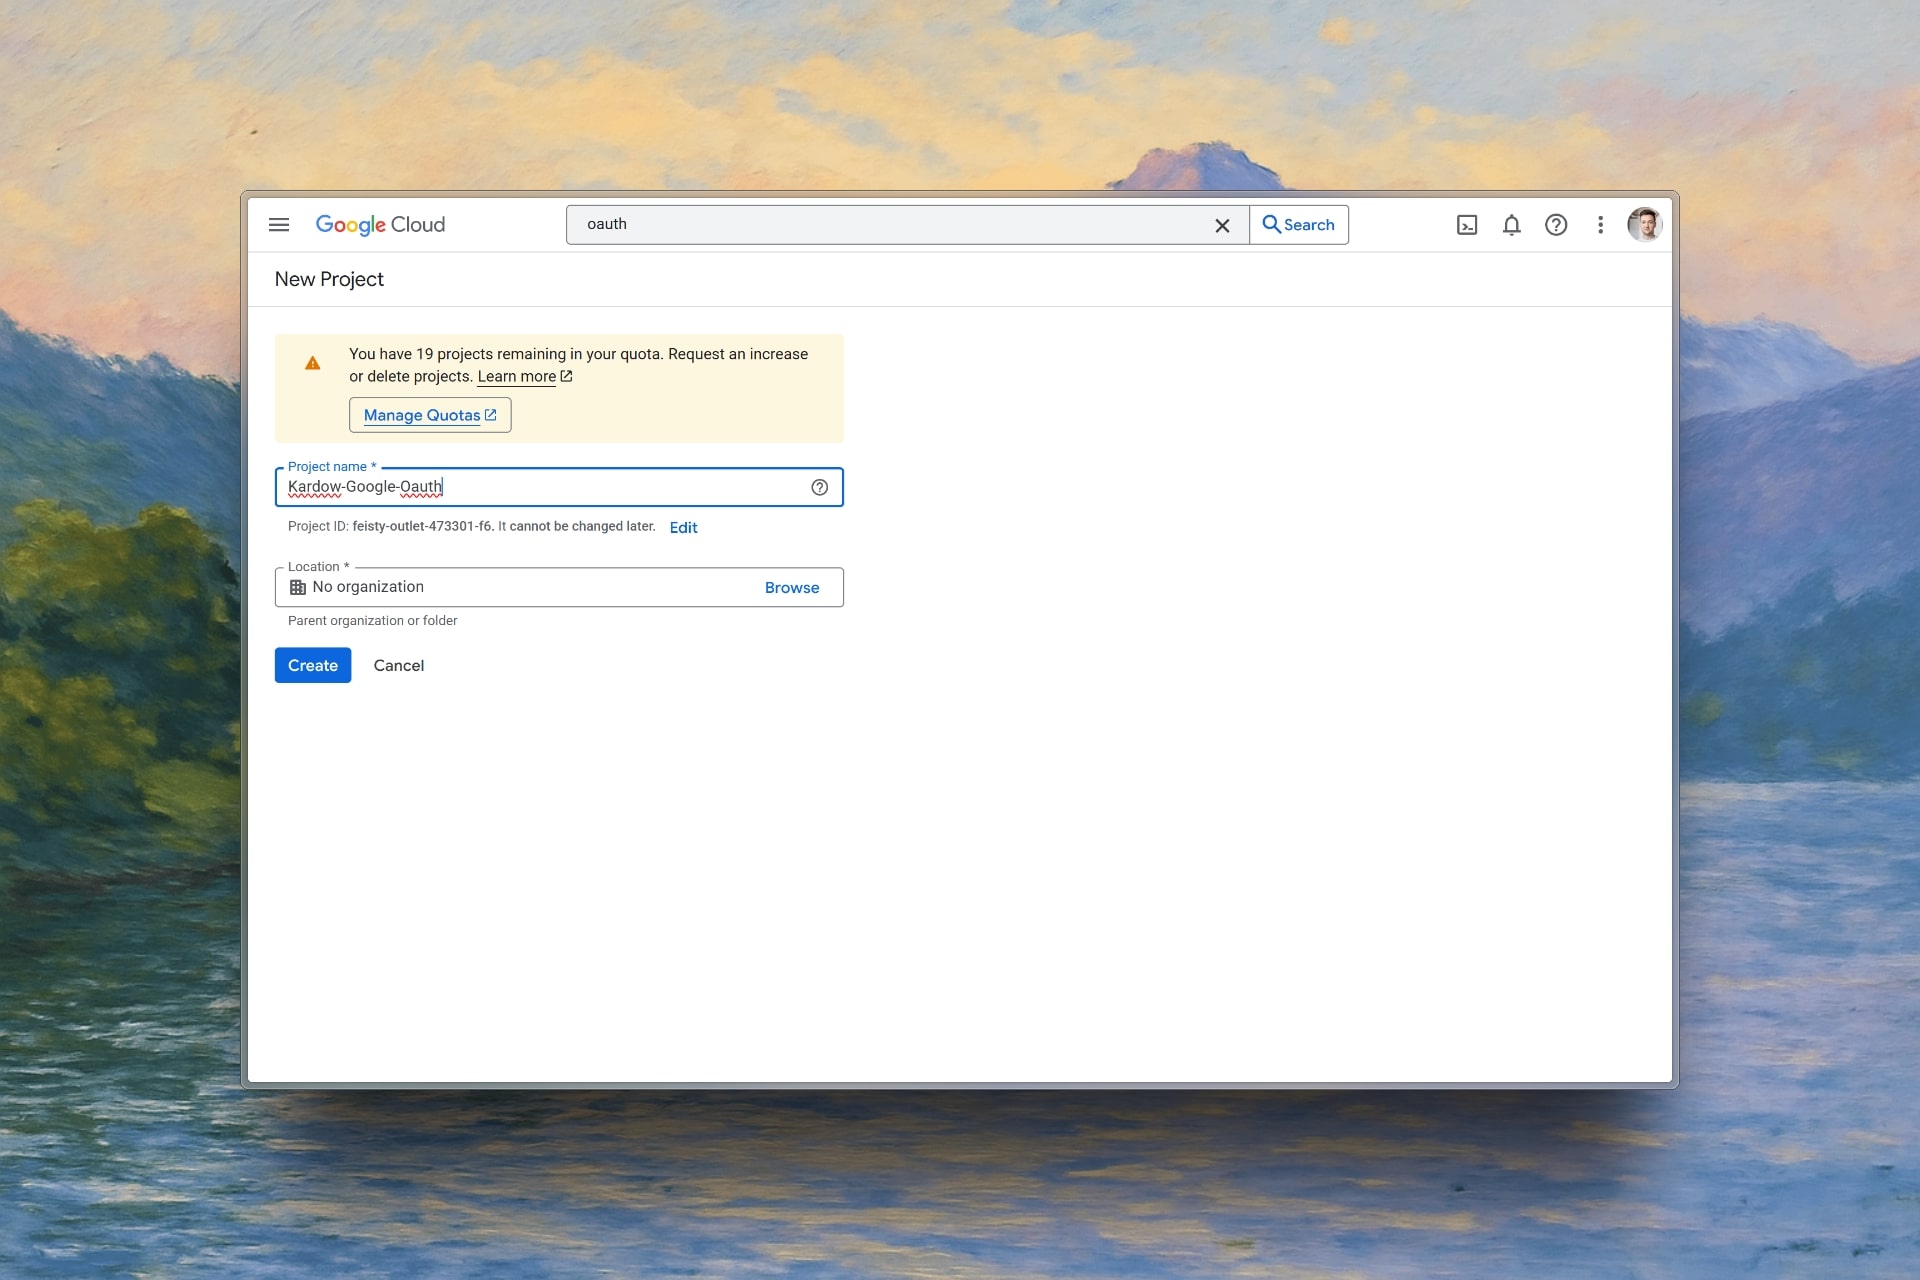
### 2. Create or Select a Project
If you don't have a project yet, create a new one. Otherwise, select your existing project from the dropdown menu.
### 3. Enable Google OAuth API
Navigate to "APIs & Services" → "Credentials" in your Google Cloud project.
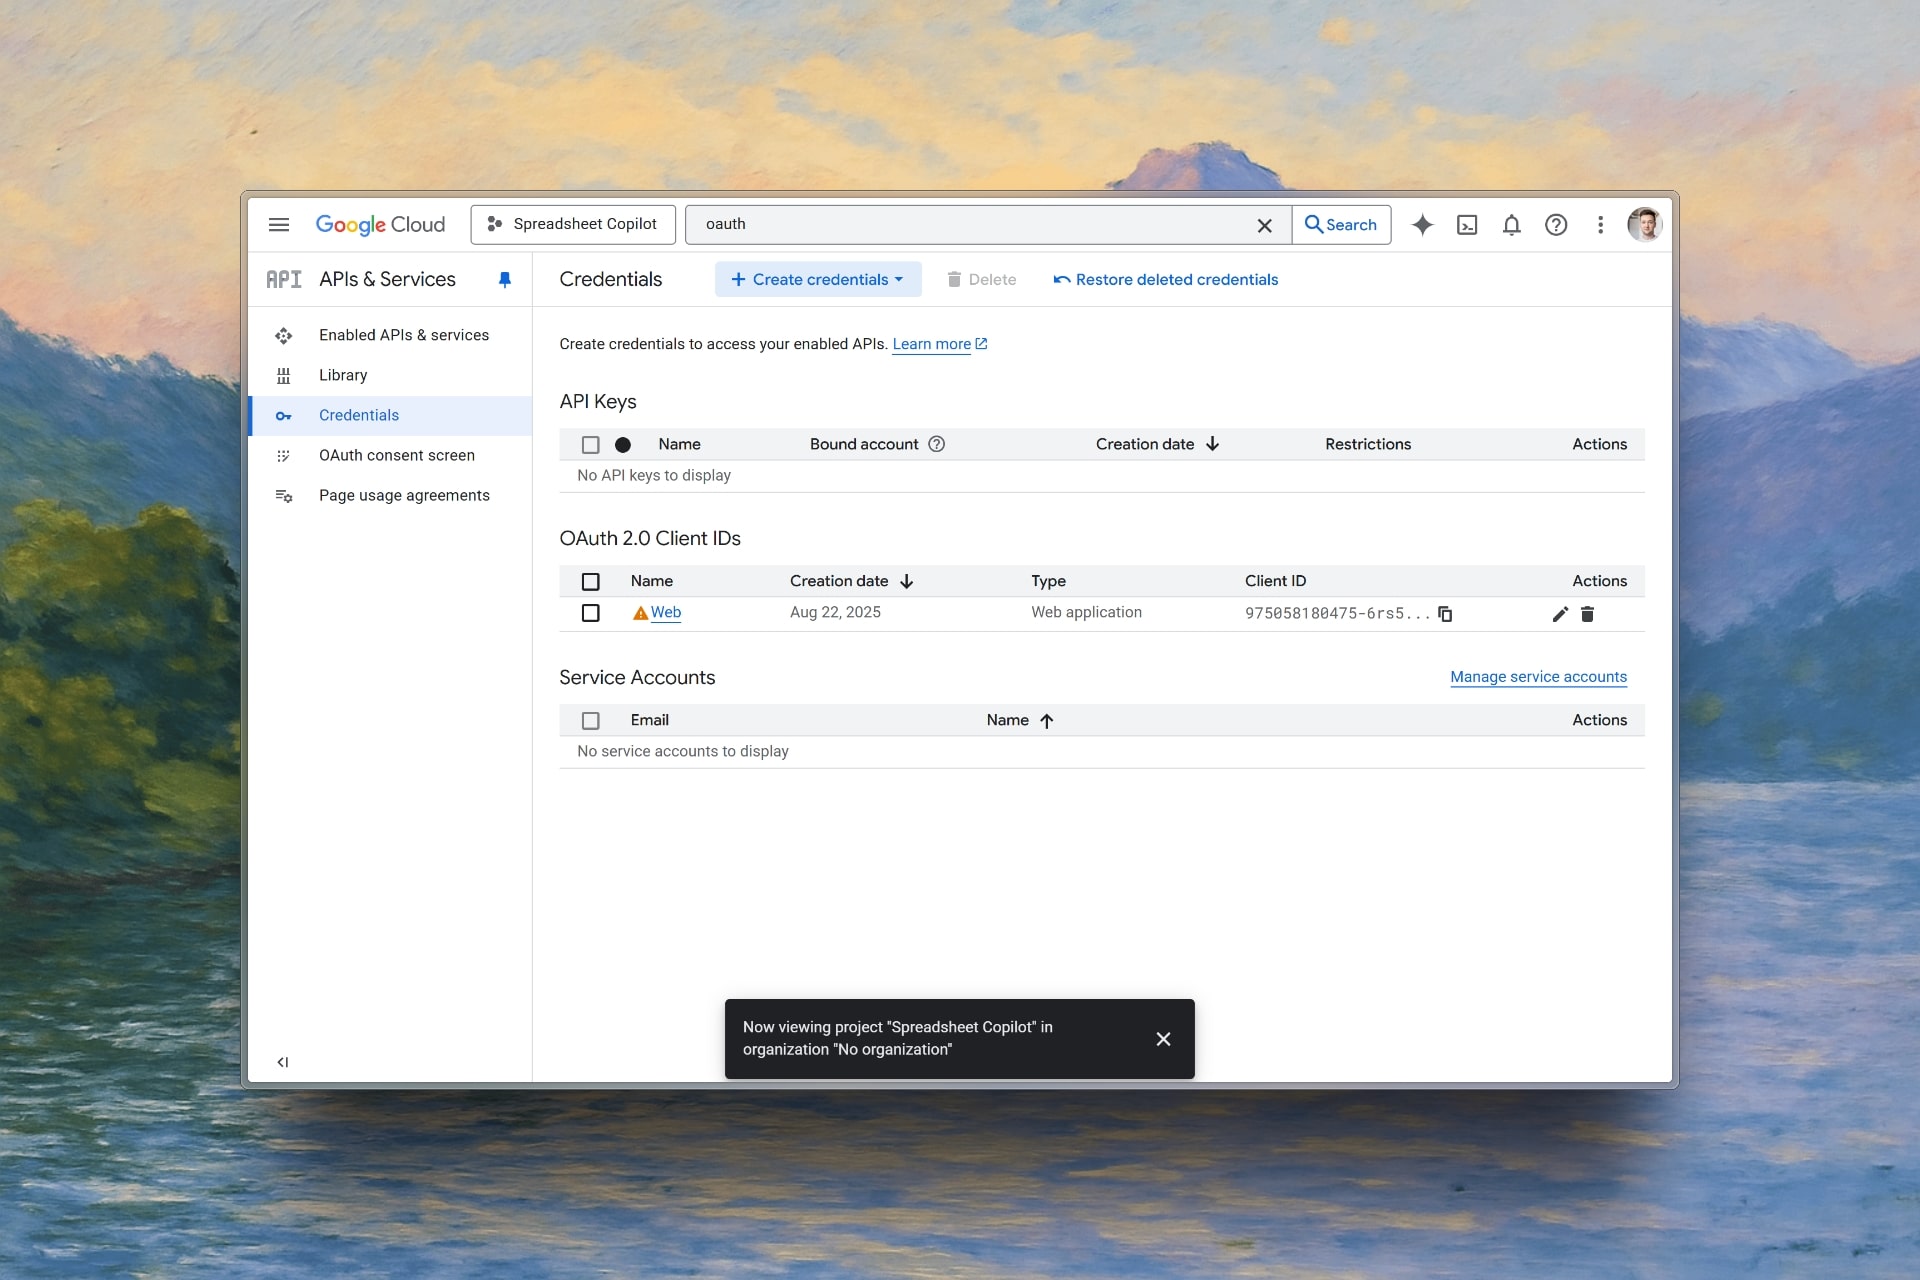
### 4. Create OAuth Client ID
Click "Create credentials" and select "OAuth client ID"
Choose "Web application" as the application type
Add your domain(s) in the authorized domains section
Add your redirect URI: `https://your-job-board-name.com/oauth/google/callback`
Replace `your-job-board-name.com` with your actual Kardow domain.
Click "Create" to generate your OAuth credentials
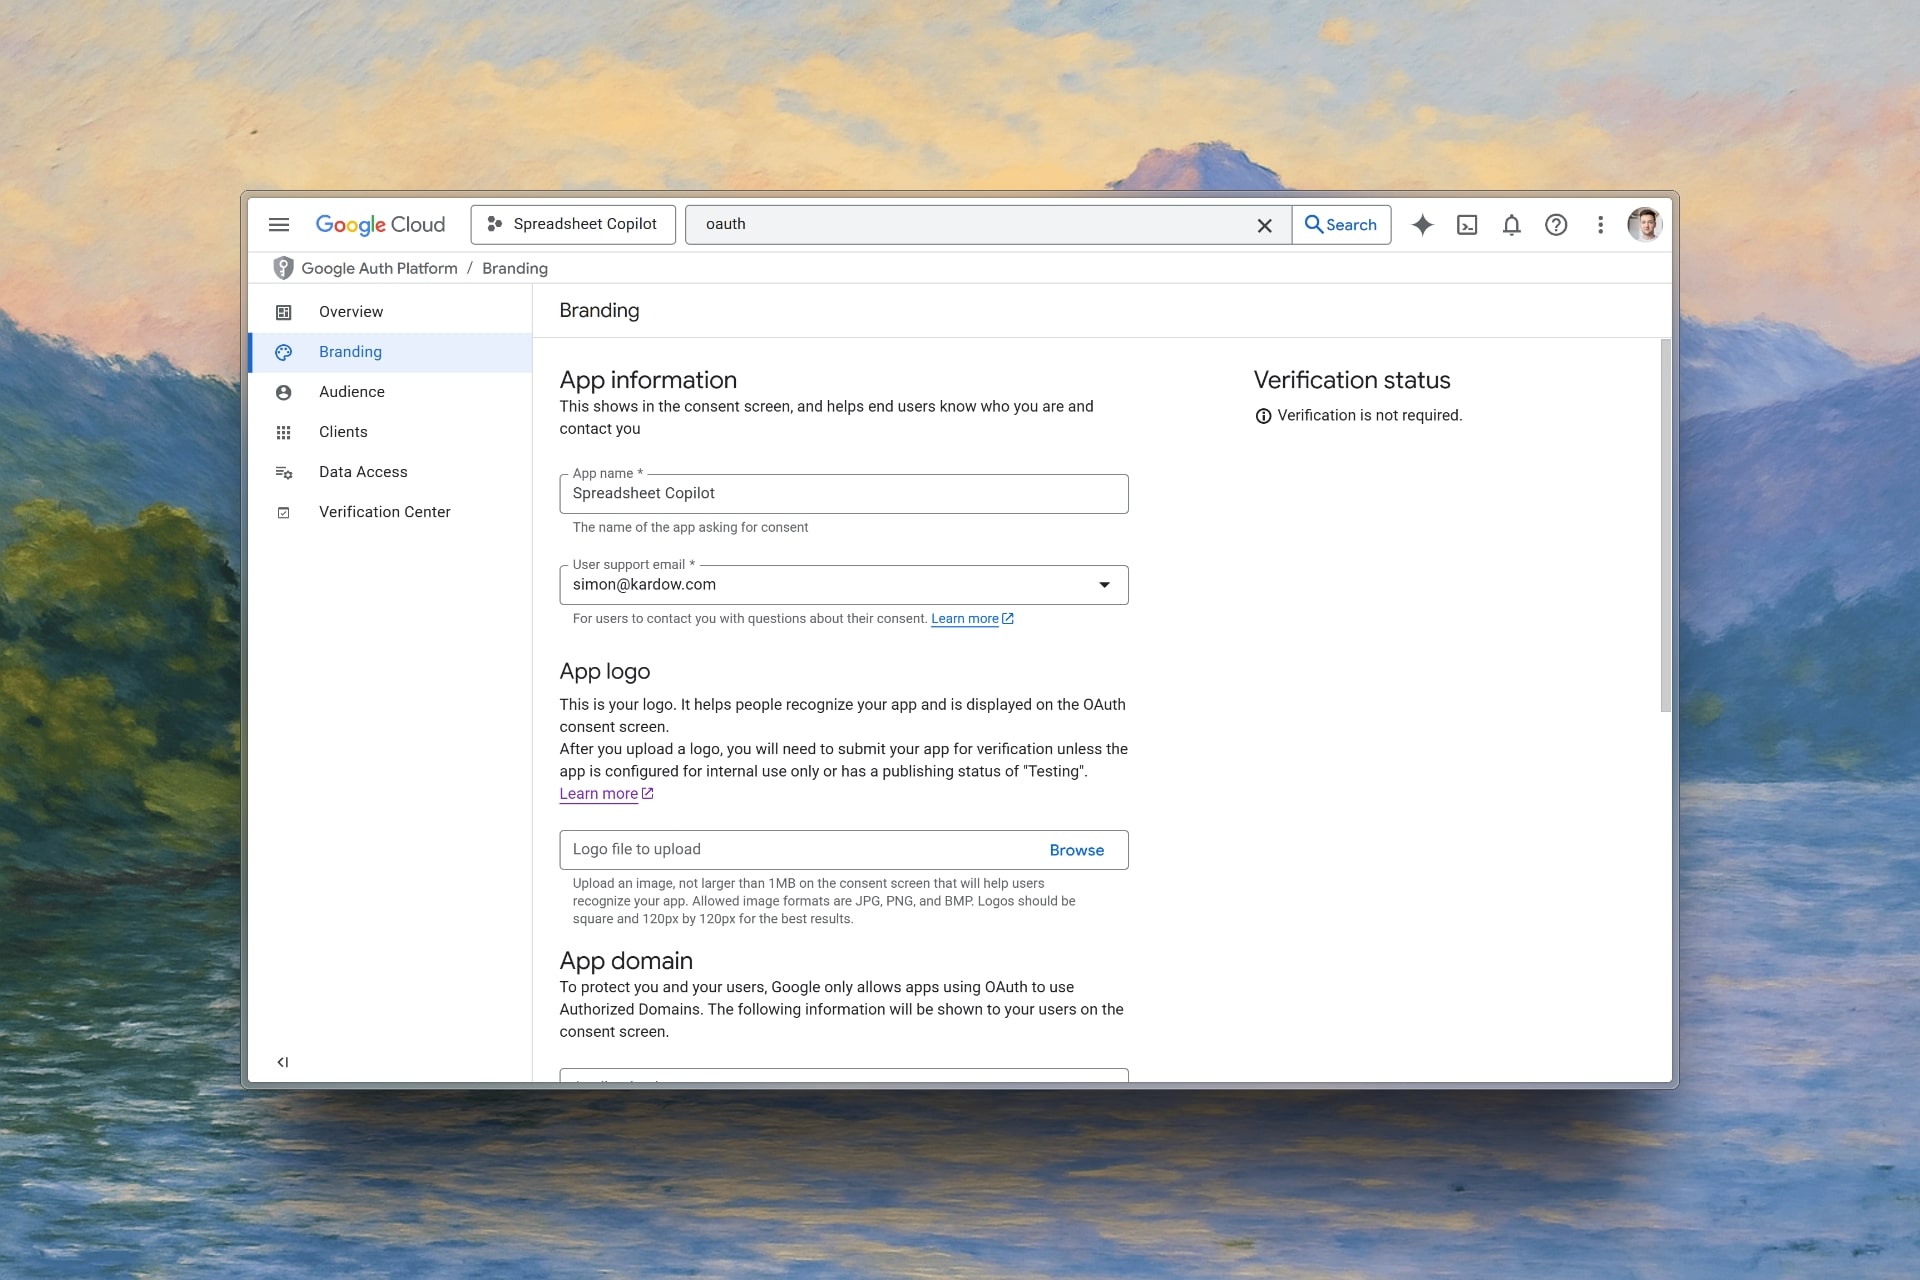
### 5. Configure OAuth Consent Screen (Recommended)
Go to "OAuth consent screen" → "Branding"
* App name
* User support email
* Application homepage URL
* Privacy policy URL
* Terms of service URL
Include your domain in the "Authorized domains" section
Click "Save" to apply your consent screen settings
### 6. Copy Your Credentials
Save your **Client ID** and **Client Secret** - you'll need these for Kardow configuration.
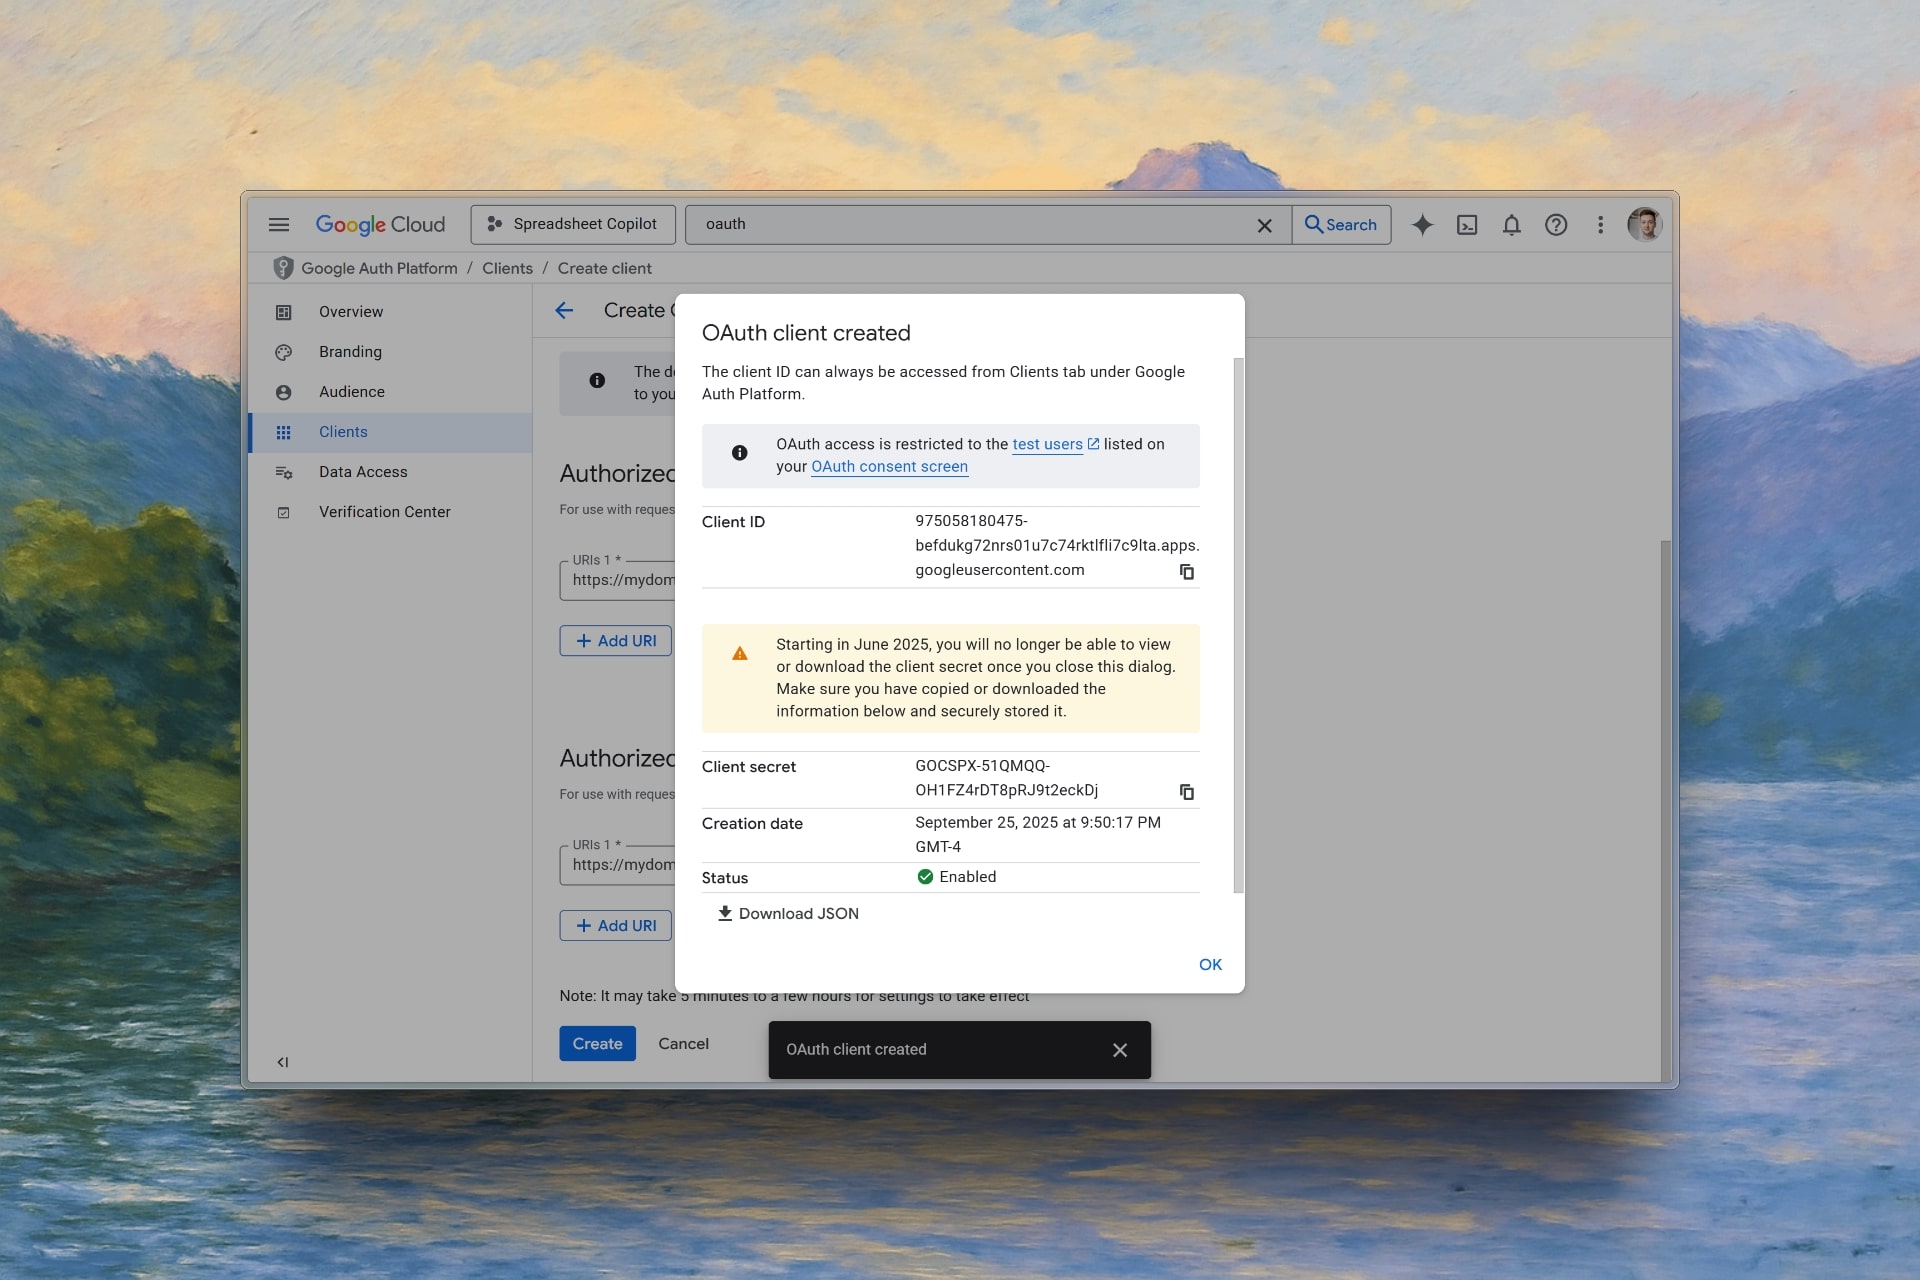
Keep your Client Secret secure and never share it publicly.
## Configure Google OAuth in Kardow
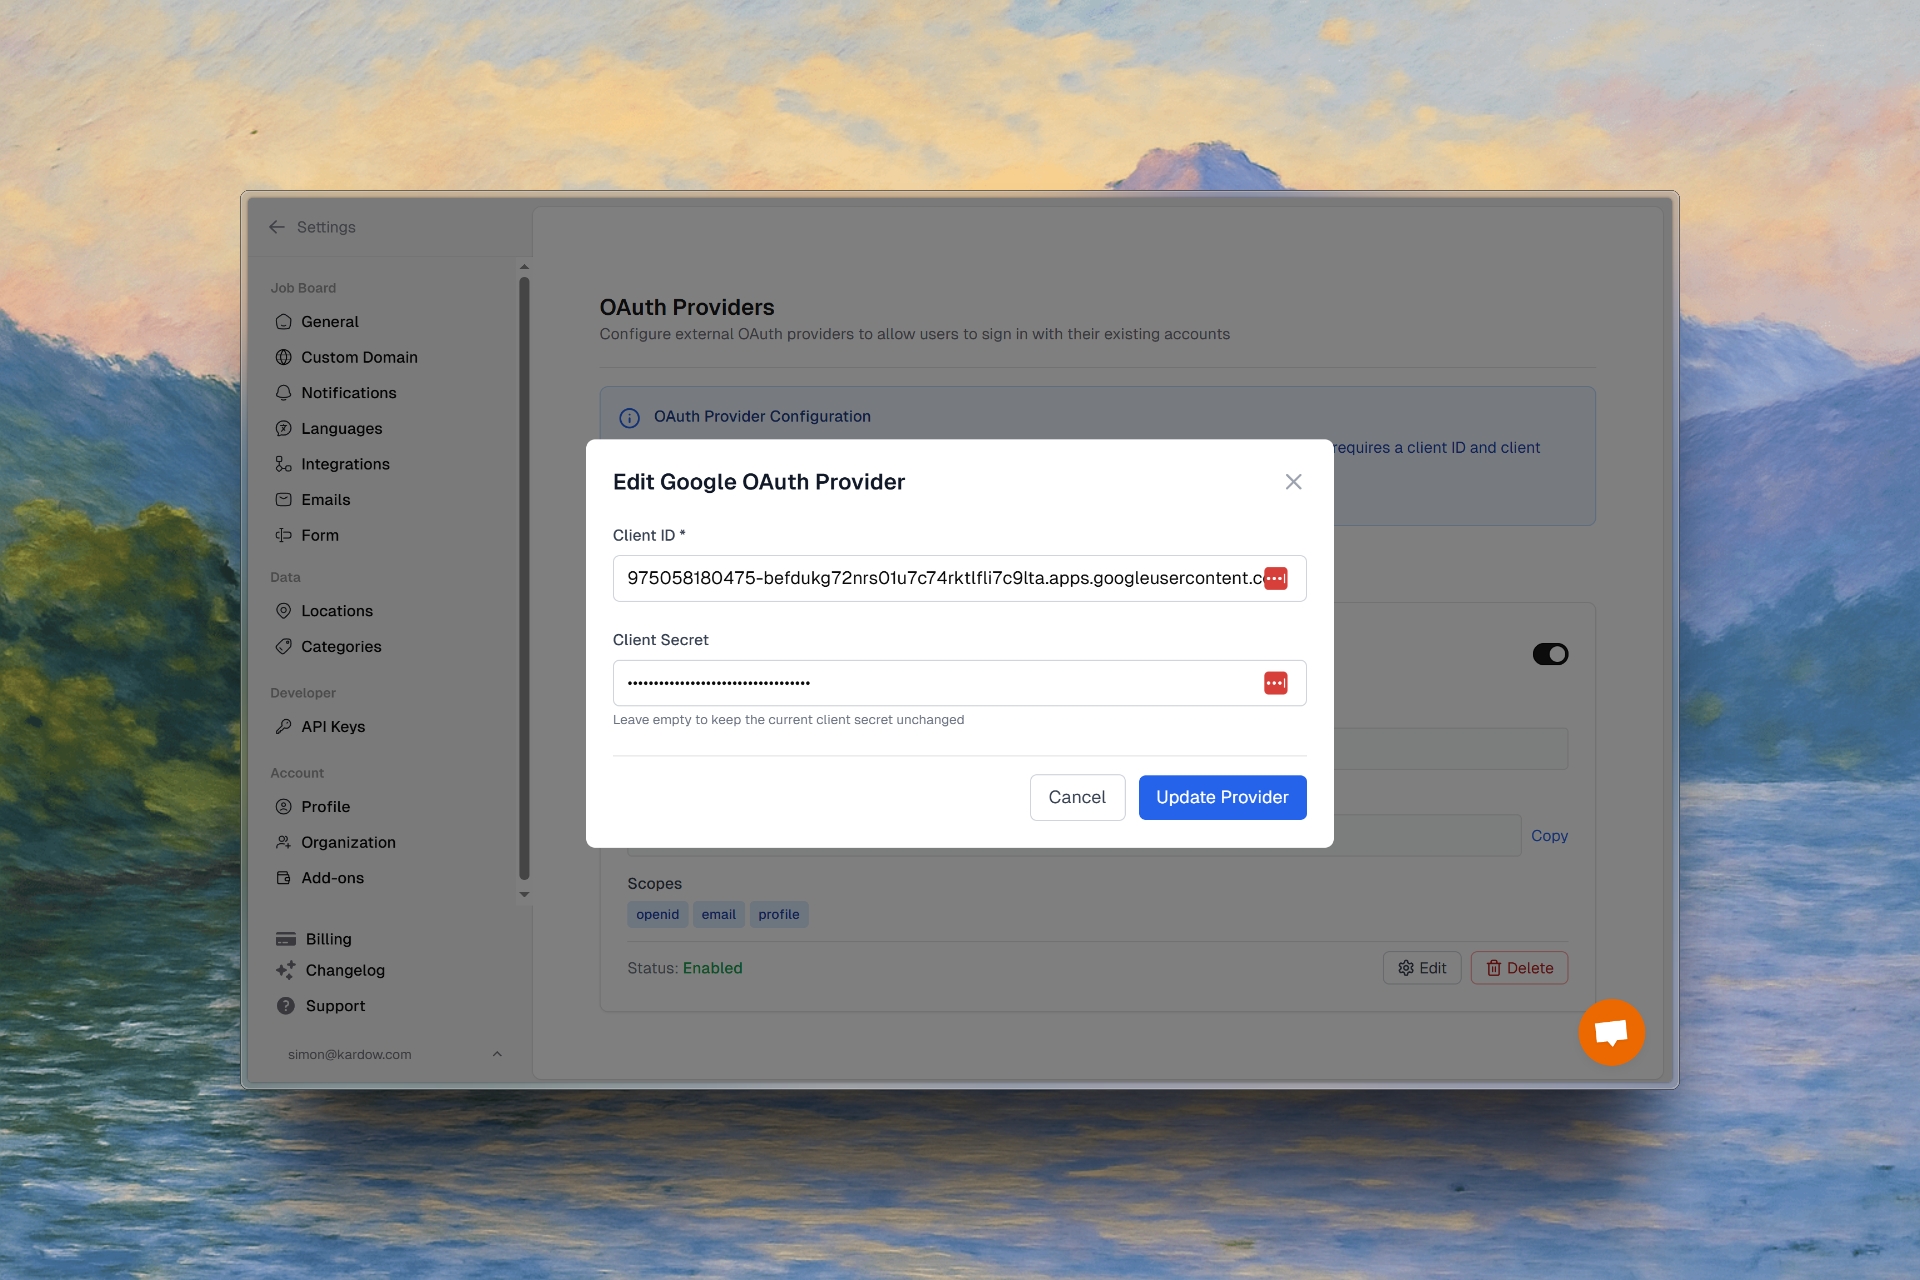
### 1. Access OAuth Settings
In your Kardow dashboard, navigate to **Settings** → **OAuth**.

### 2. Enable Google OAuth
Toggle on "Google OAuth"
* Paste your **Client ID** from Google Cloud
* Paste your **Client Secret** from Google Cloud
Click "Save" to apply your OAuth configuration
## Enable Google One Tap (Optional)
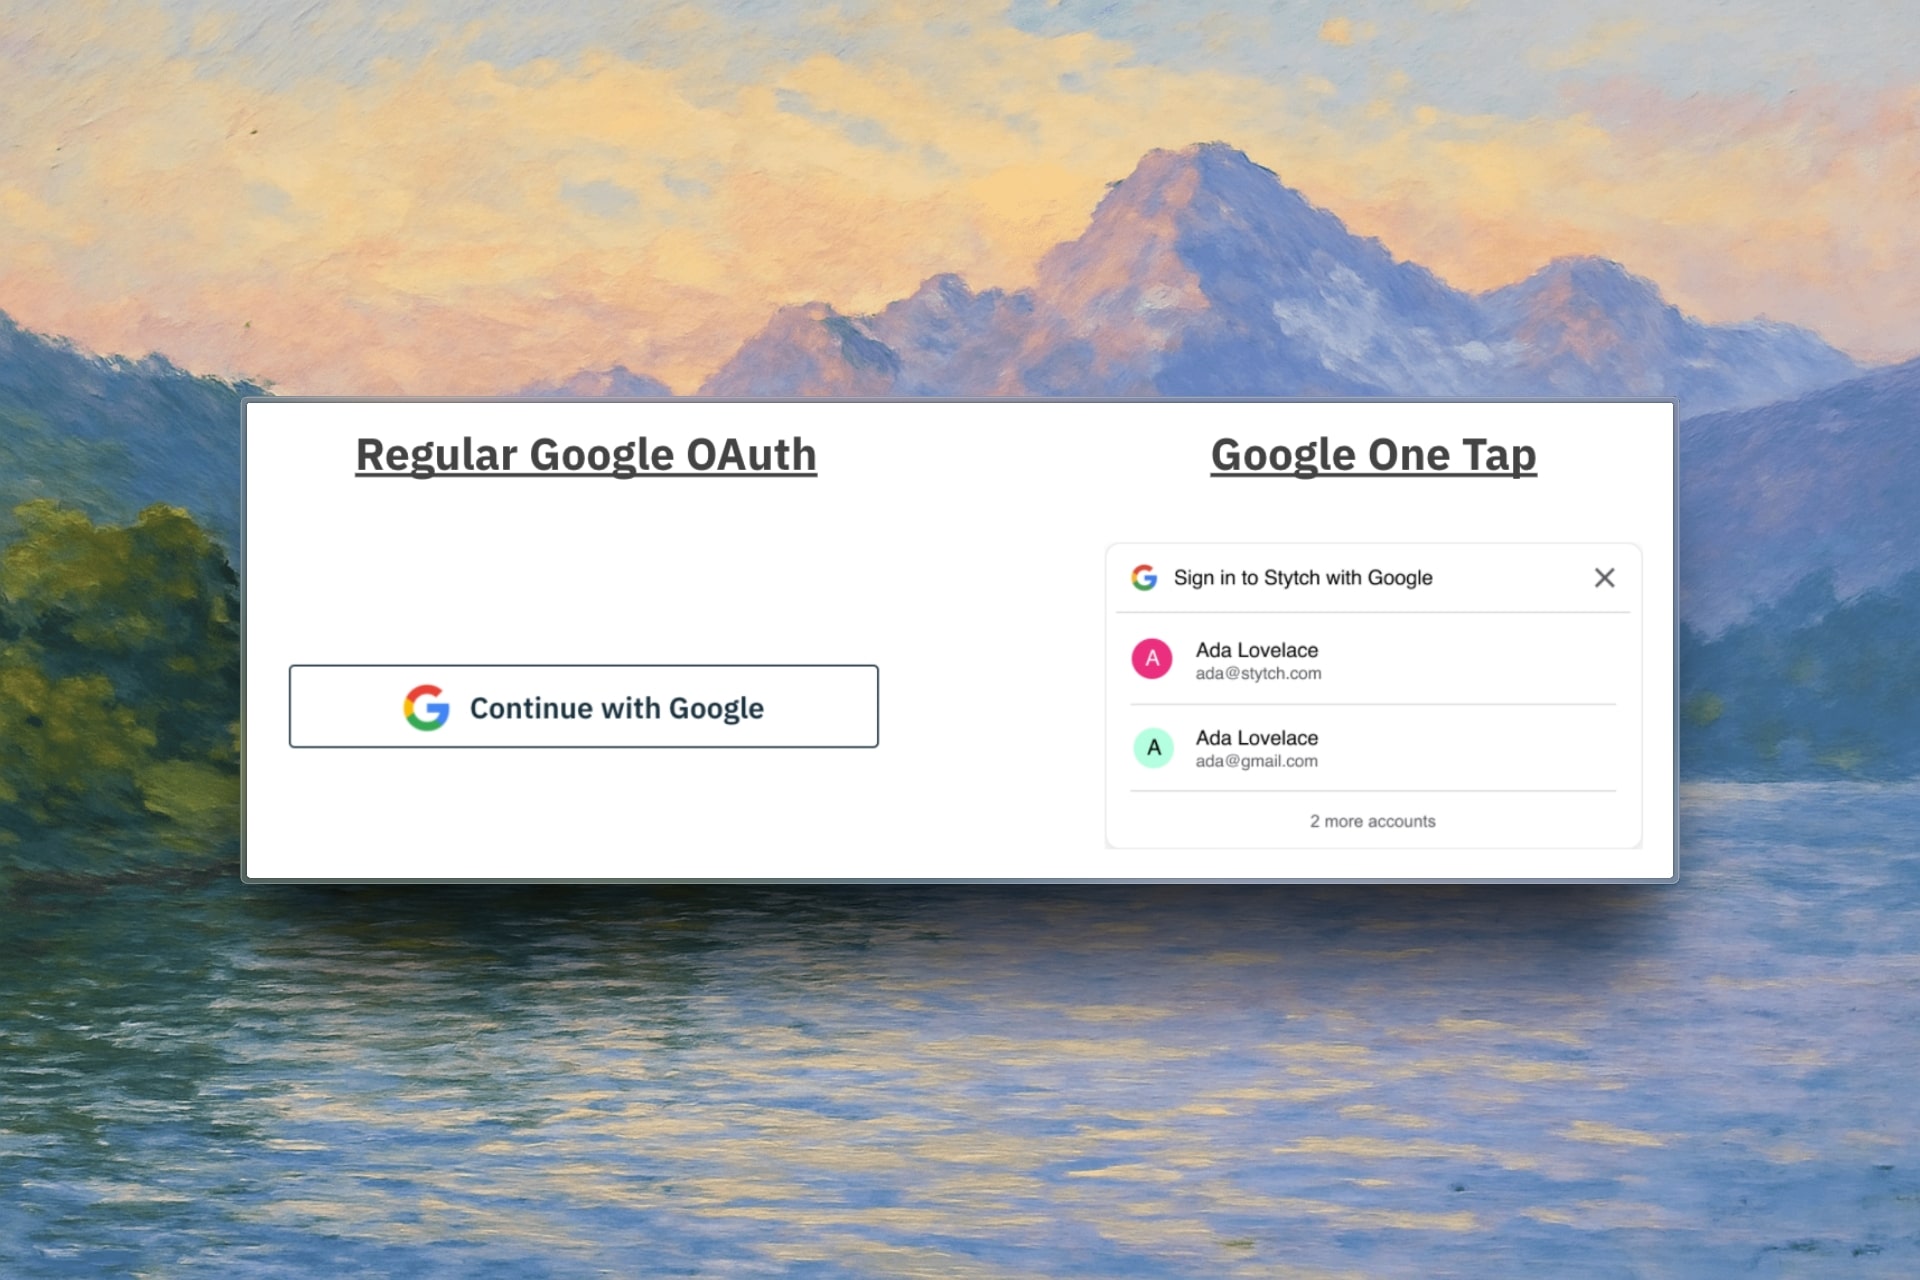
Google One Tap provides a seamless sign-in experience with a popup instead of redirecting users to Google's login page.
One Tap works alongside regular Google OAuth and doesn't require additional Google Cloud configuration.
### Configure One Tap in Kardow
Go to your Kardow OAuth settings
Toggle on "Enable Google One Tap"
Users will now see a Google One Tap popup on your job board
## Test Your Setup
Go to your Kardow job board's login page
Click the "Sign in with Google" button
Follow the Google authentication process
Confirm you're successfully logged into your job board
Your users can now sign in quickly with their Google accounts, making your job board more accessible to job seekers and employers!
## Troubleshooting
### Common Issues
**Redirect URI Mismatch**
* Ensure your redirect URI in Google Cloud exactly matches: `https://yourdomain.com/oauth/google/callback`
**OAuth Consent Screen Not Configured**
* Complete the OAuth consent screen setup for production use
**Credentials Not Working**
* Verify your Client ID and Client Secret are copied correctly
* Ensure there are no extra spaces or characters
### Need Help?
If you're still having issues, use the chat at the bottom or contact [support](mailto:support@kardow.com) by email.