

Prerequisites
Before you begin, you’ll need to set up a Google Cloud project and configure OAuth credentials:Create OAuth Credentials in Google Cloud
1. Access Google Cloud Console
Visit the Google Cloud Console and sign in with your Google account.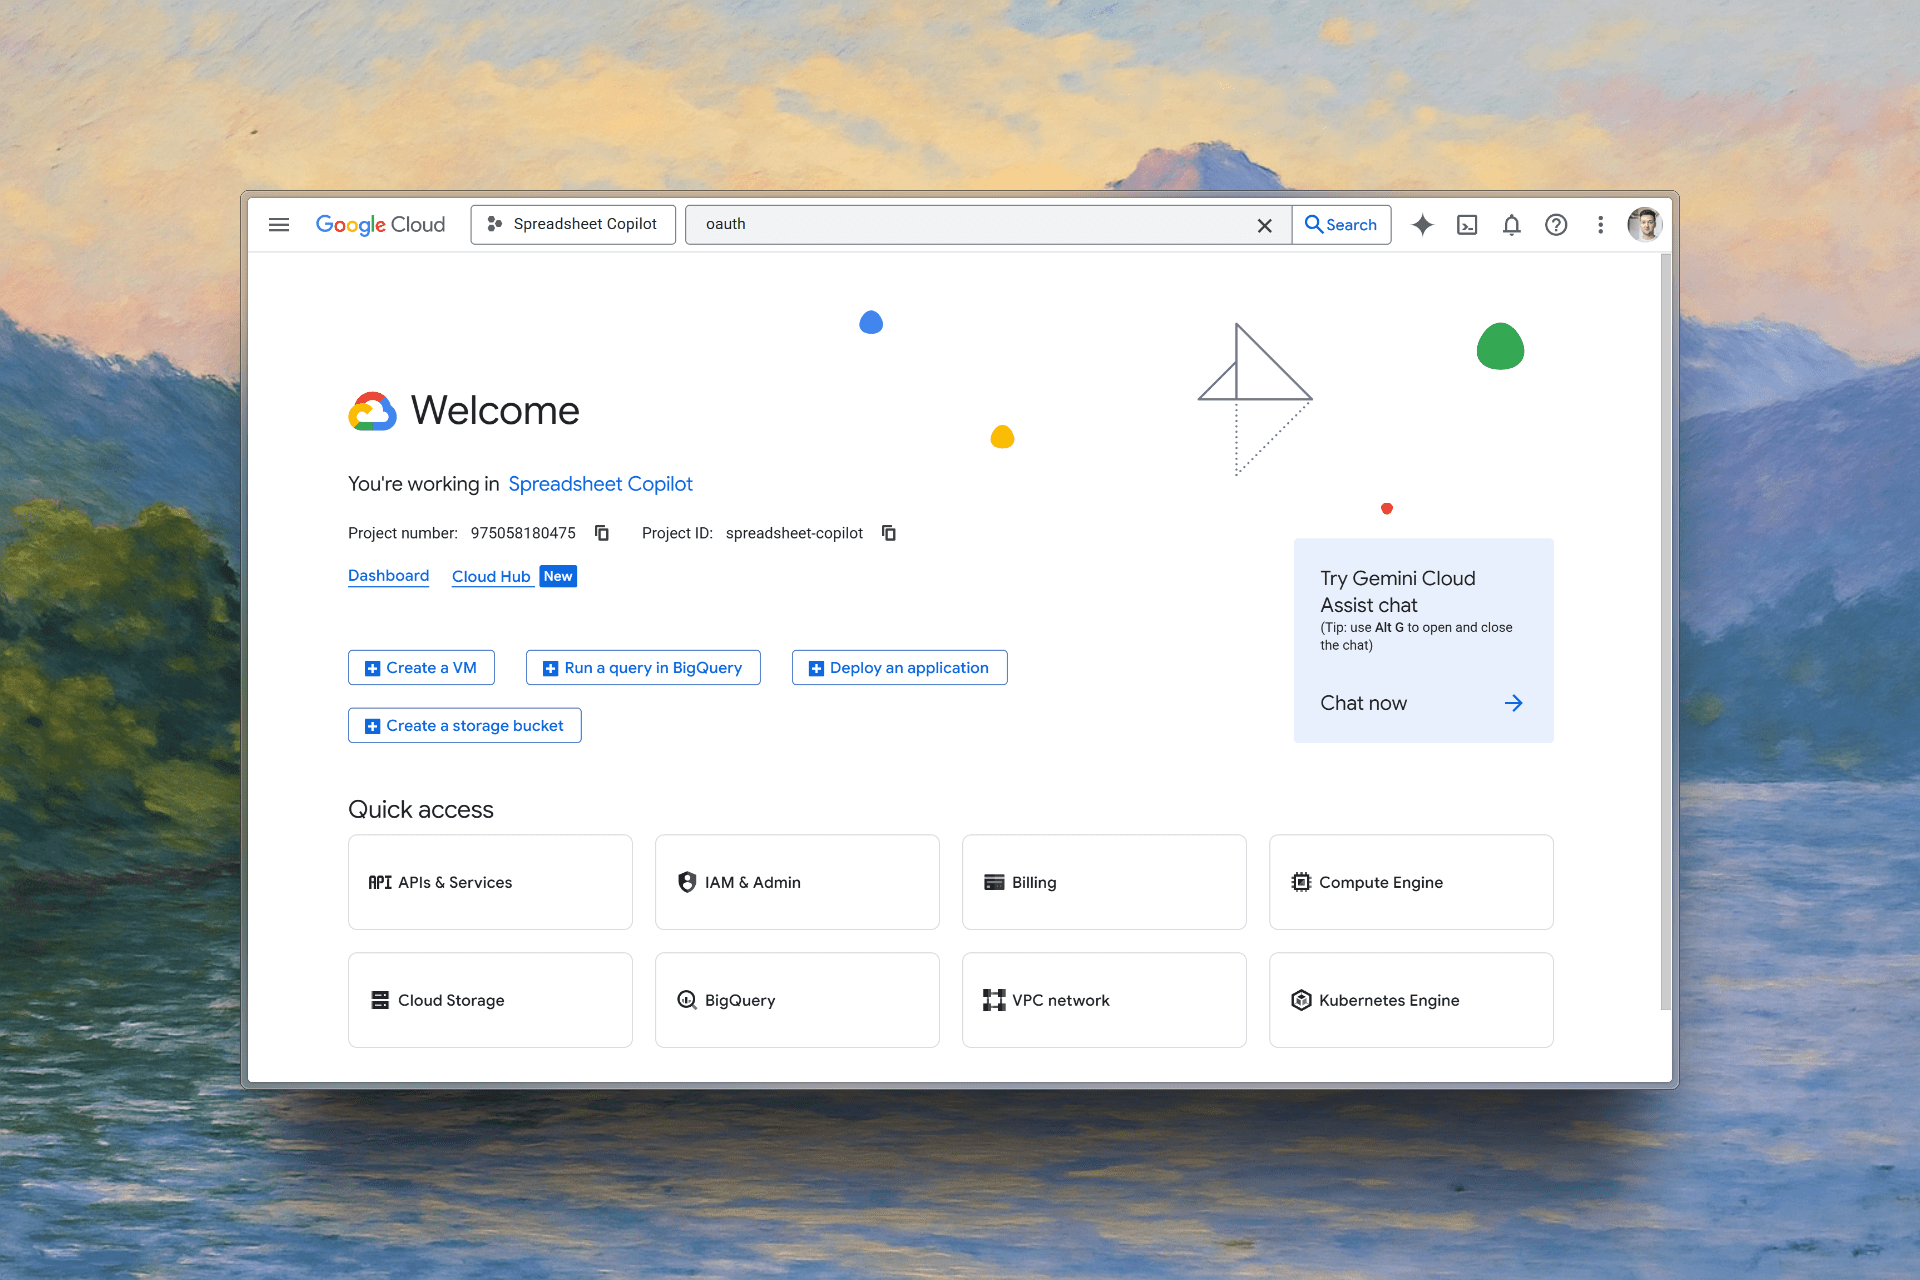
2. Create or Select a Project
If you don’t have a project yet, create a new one. Otherwise, select your existing project from the dropdown menu.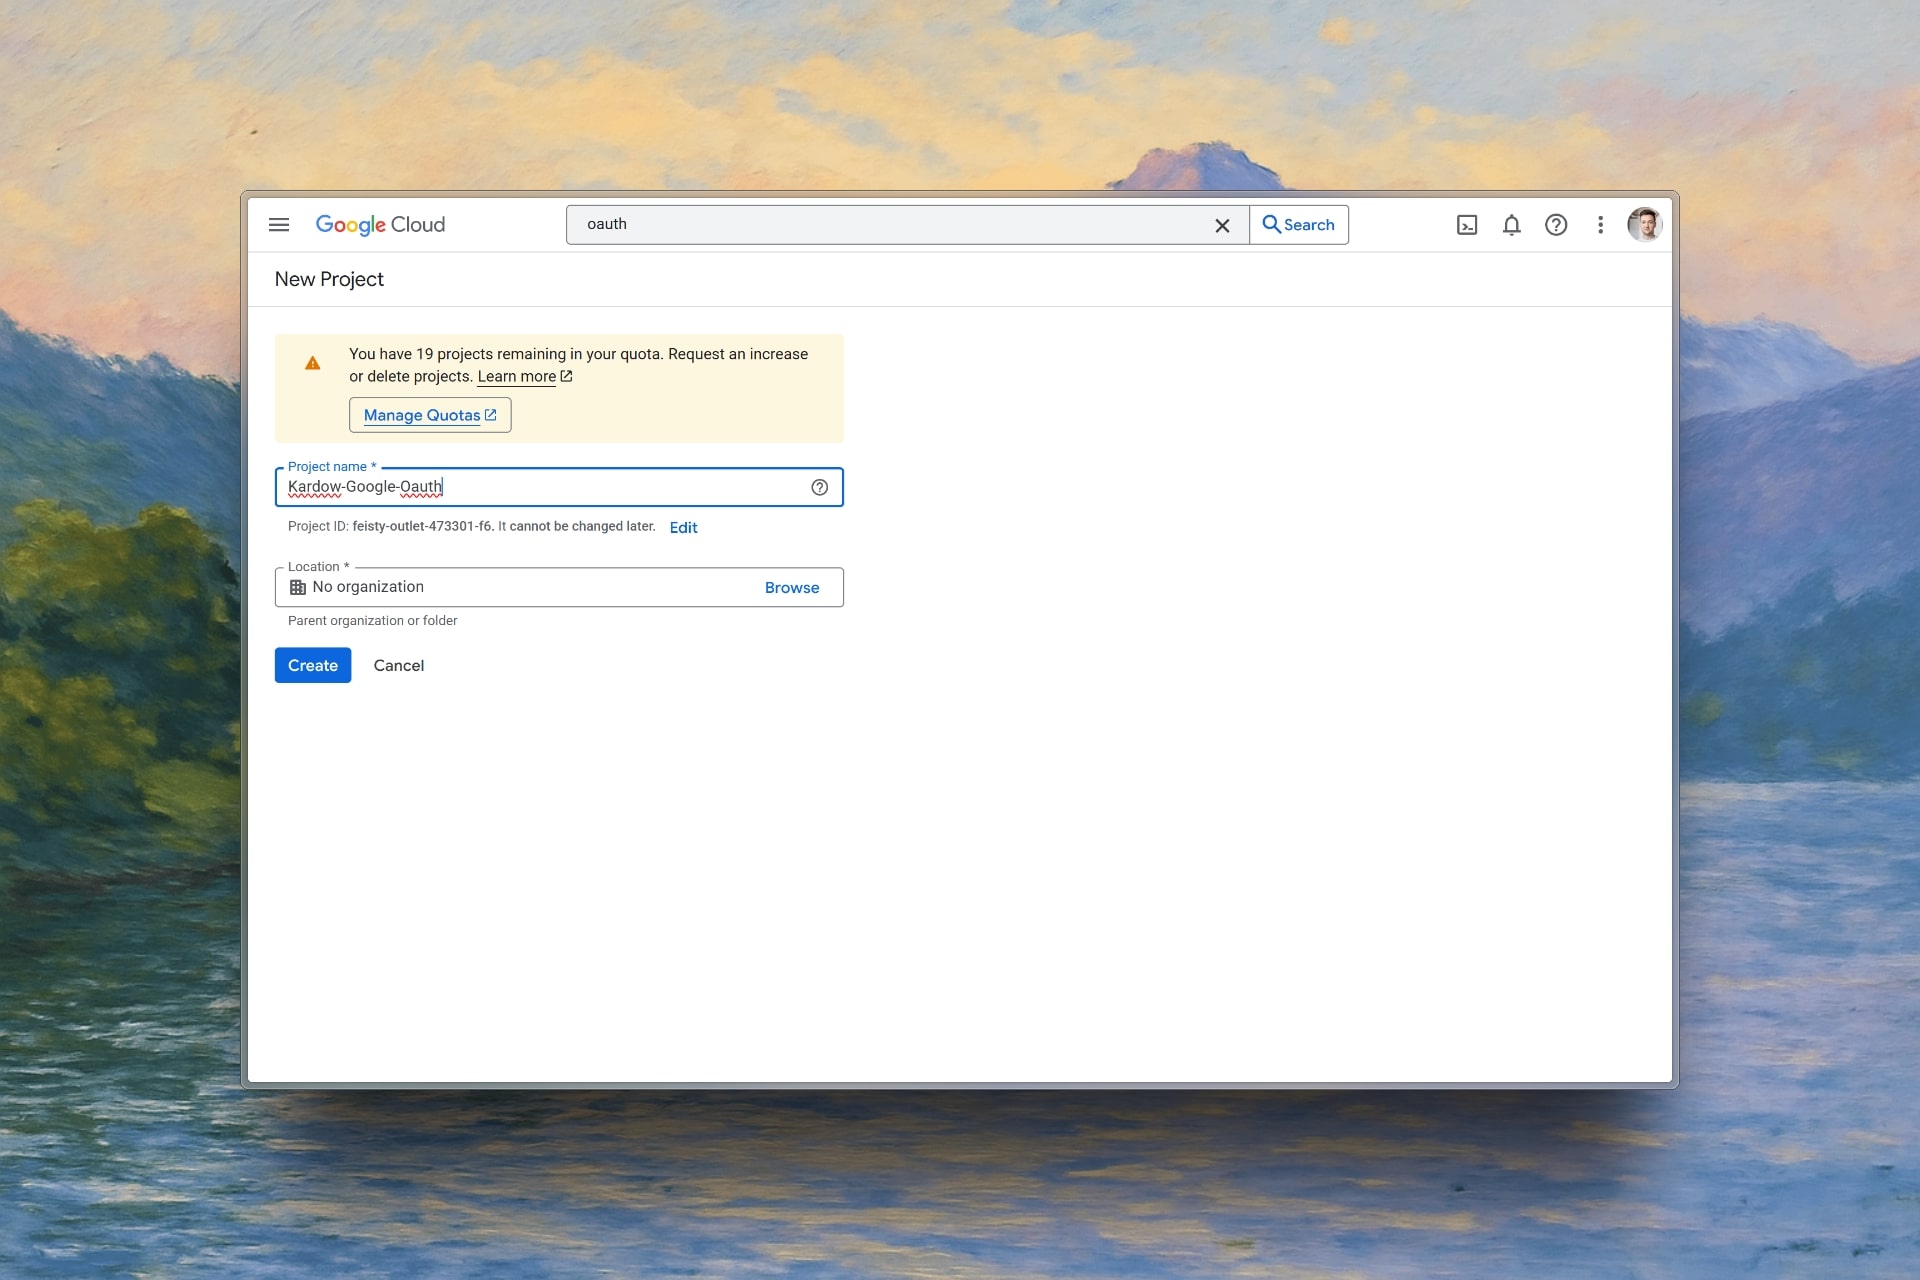
3. Enable Google OAuth API
Navigate to “APIs & Services” → “Credentials” in your Google Cloud project.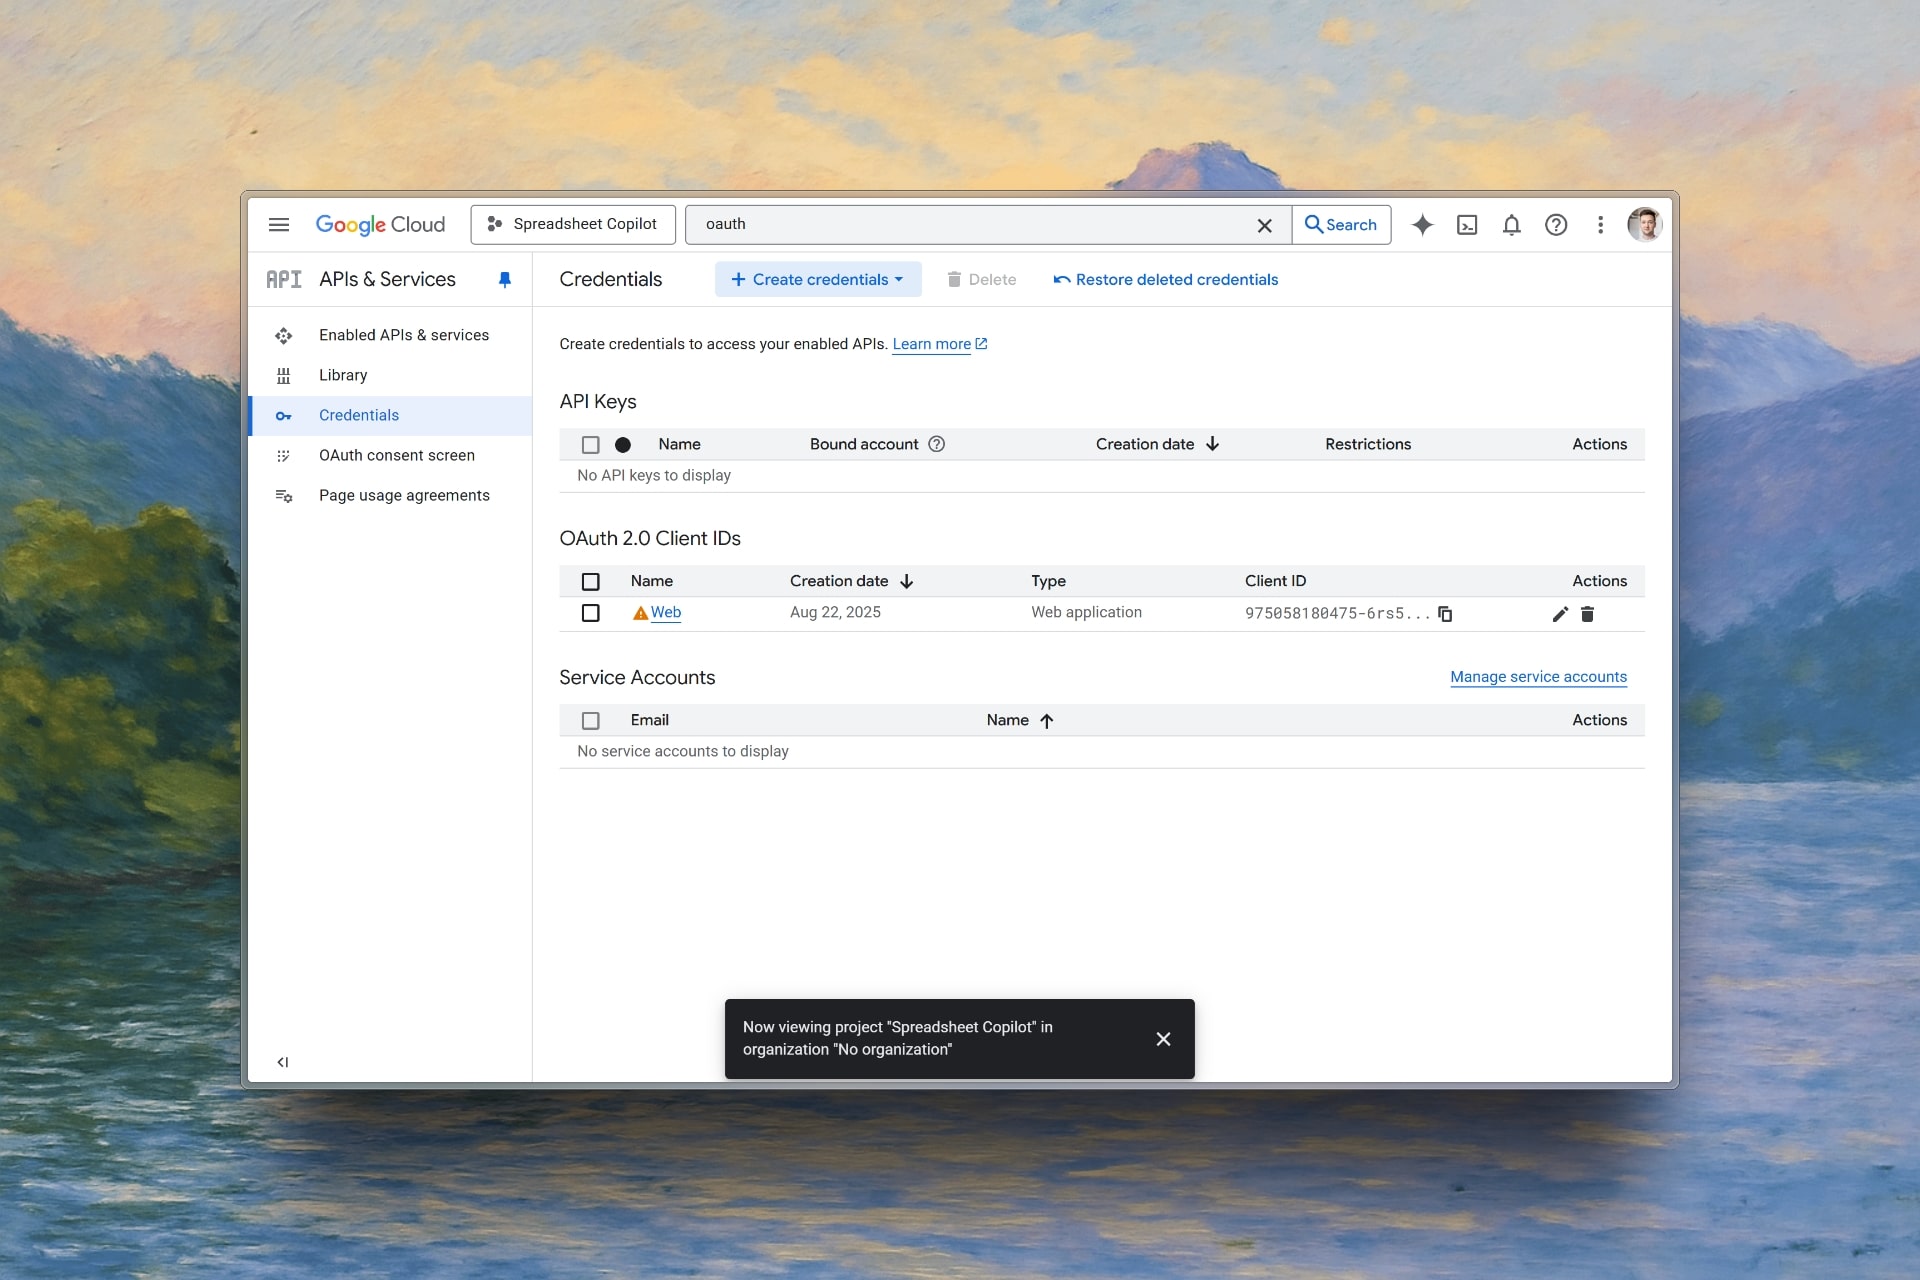
4. Create OAuth Client ID
1
Create Credentials
Click “Create credentials” and select “OAuth client ID”
2
Configure Application Type
Choose “Web application” as the application type
3
Add Authorized Domains
Add your domain(s) in the authorized domains section
4
Set Redirect URI
Add your redirect URI:
https://your-job-board-name.com/oauth/google/callbackReplace
your-job-board-name.com with your actual Kardow domain.5
Create and Save
Click “Create” to generate your OAuth credentials
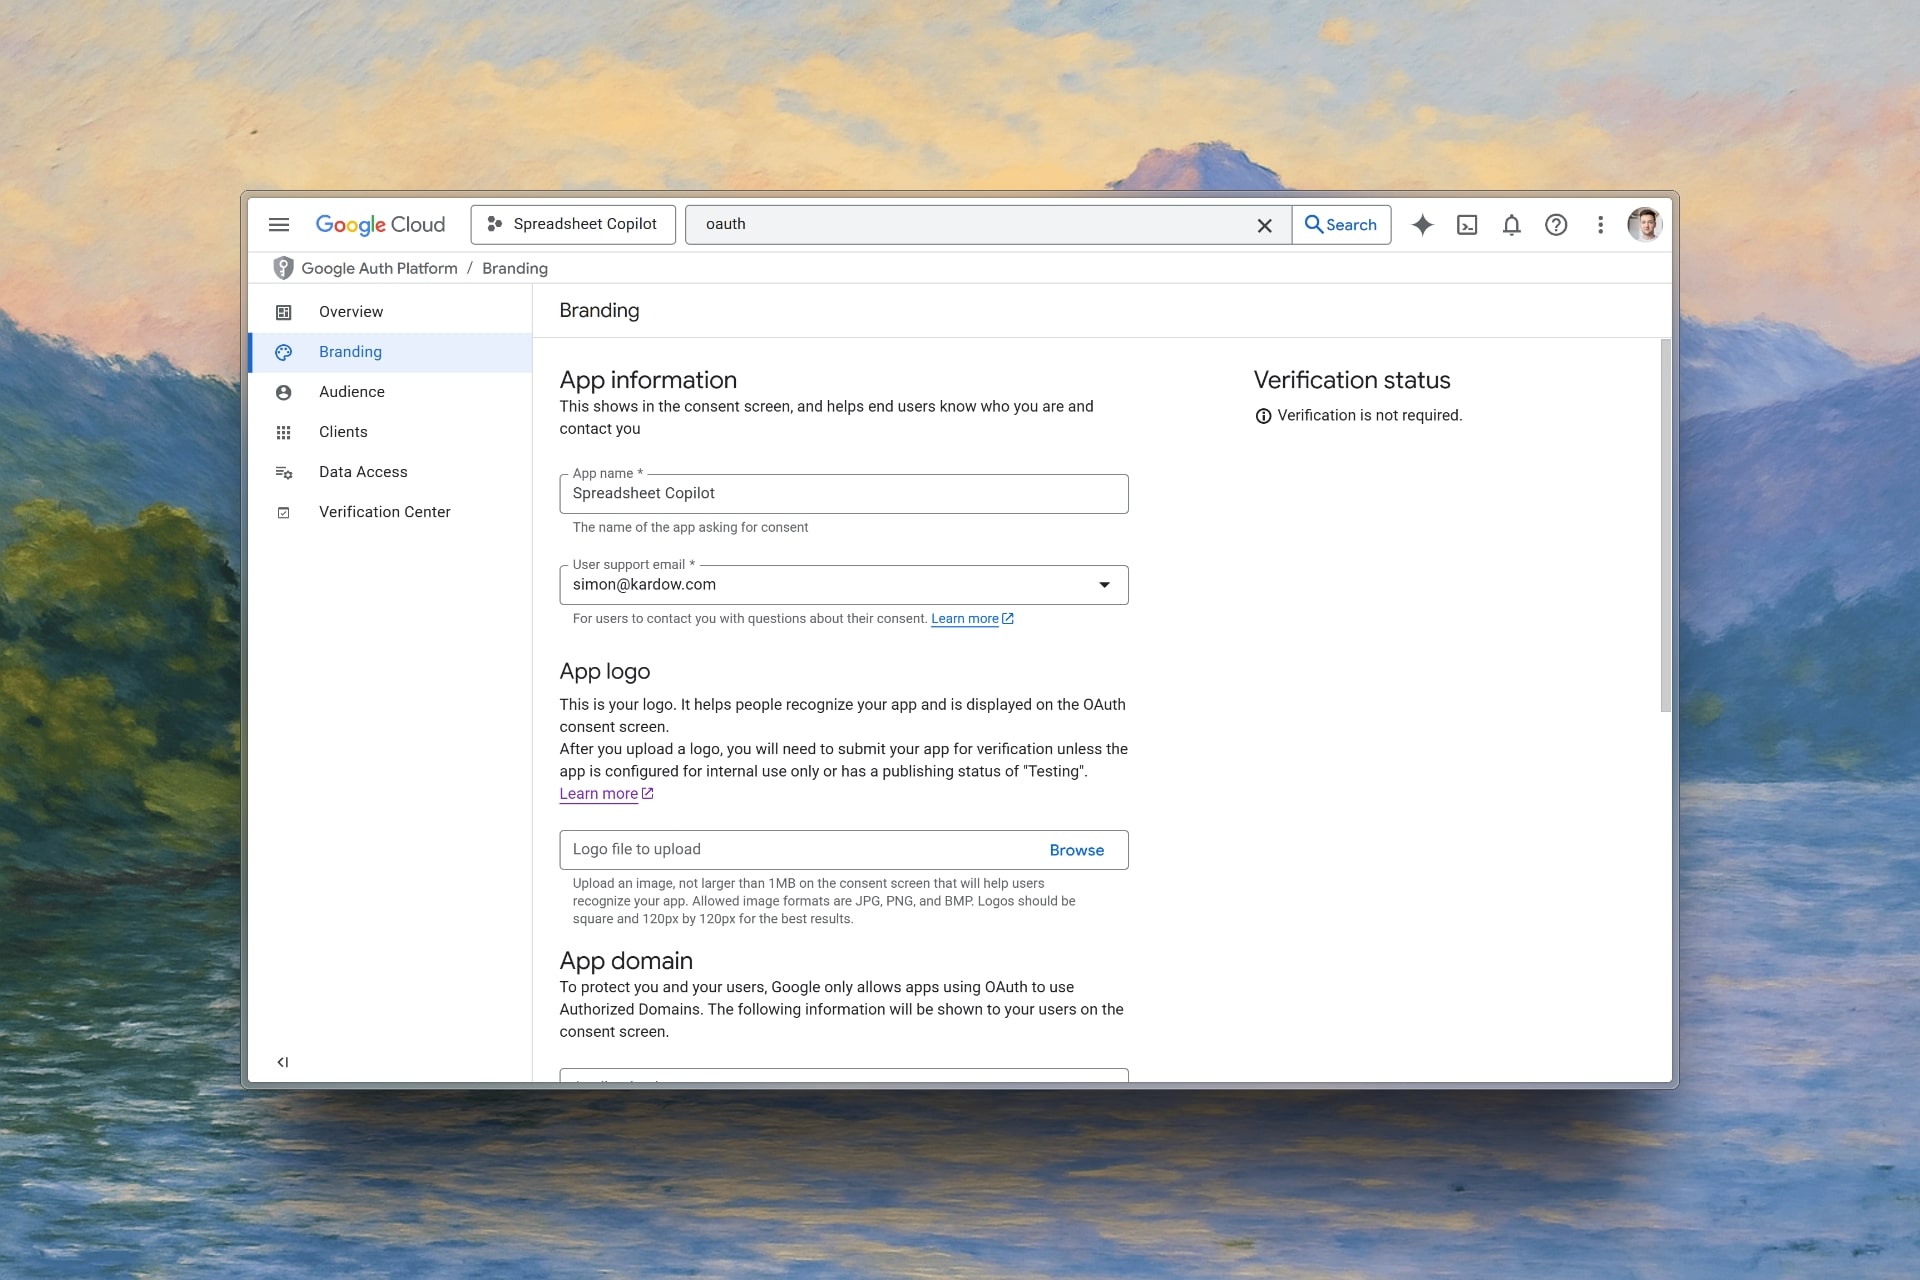
5. Configure OAuth Consent Screen (Recommended)
1
Access Consent Screen
Go to “OAuth consent screen” → “Branding”
2
Fill Application Details
- App name
- User support email
- Application homepage URL
- Privacy policy URL
- Terms of service URL
3
Add Authorized Domains
Include your domain in the “Authorized domains” section
4
Save Configuration
Click “Save” to apply your consent screen settings
6. Copy Your Credentials
Save your Client ID and Client Secret - you’ll need these for Kardow configuration.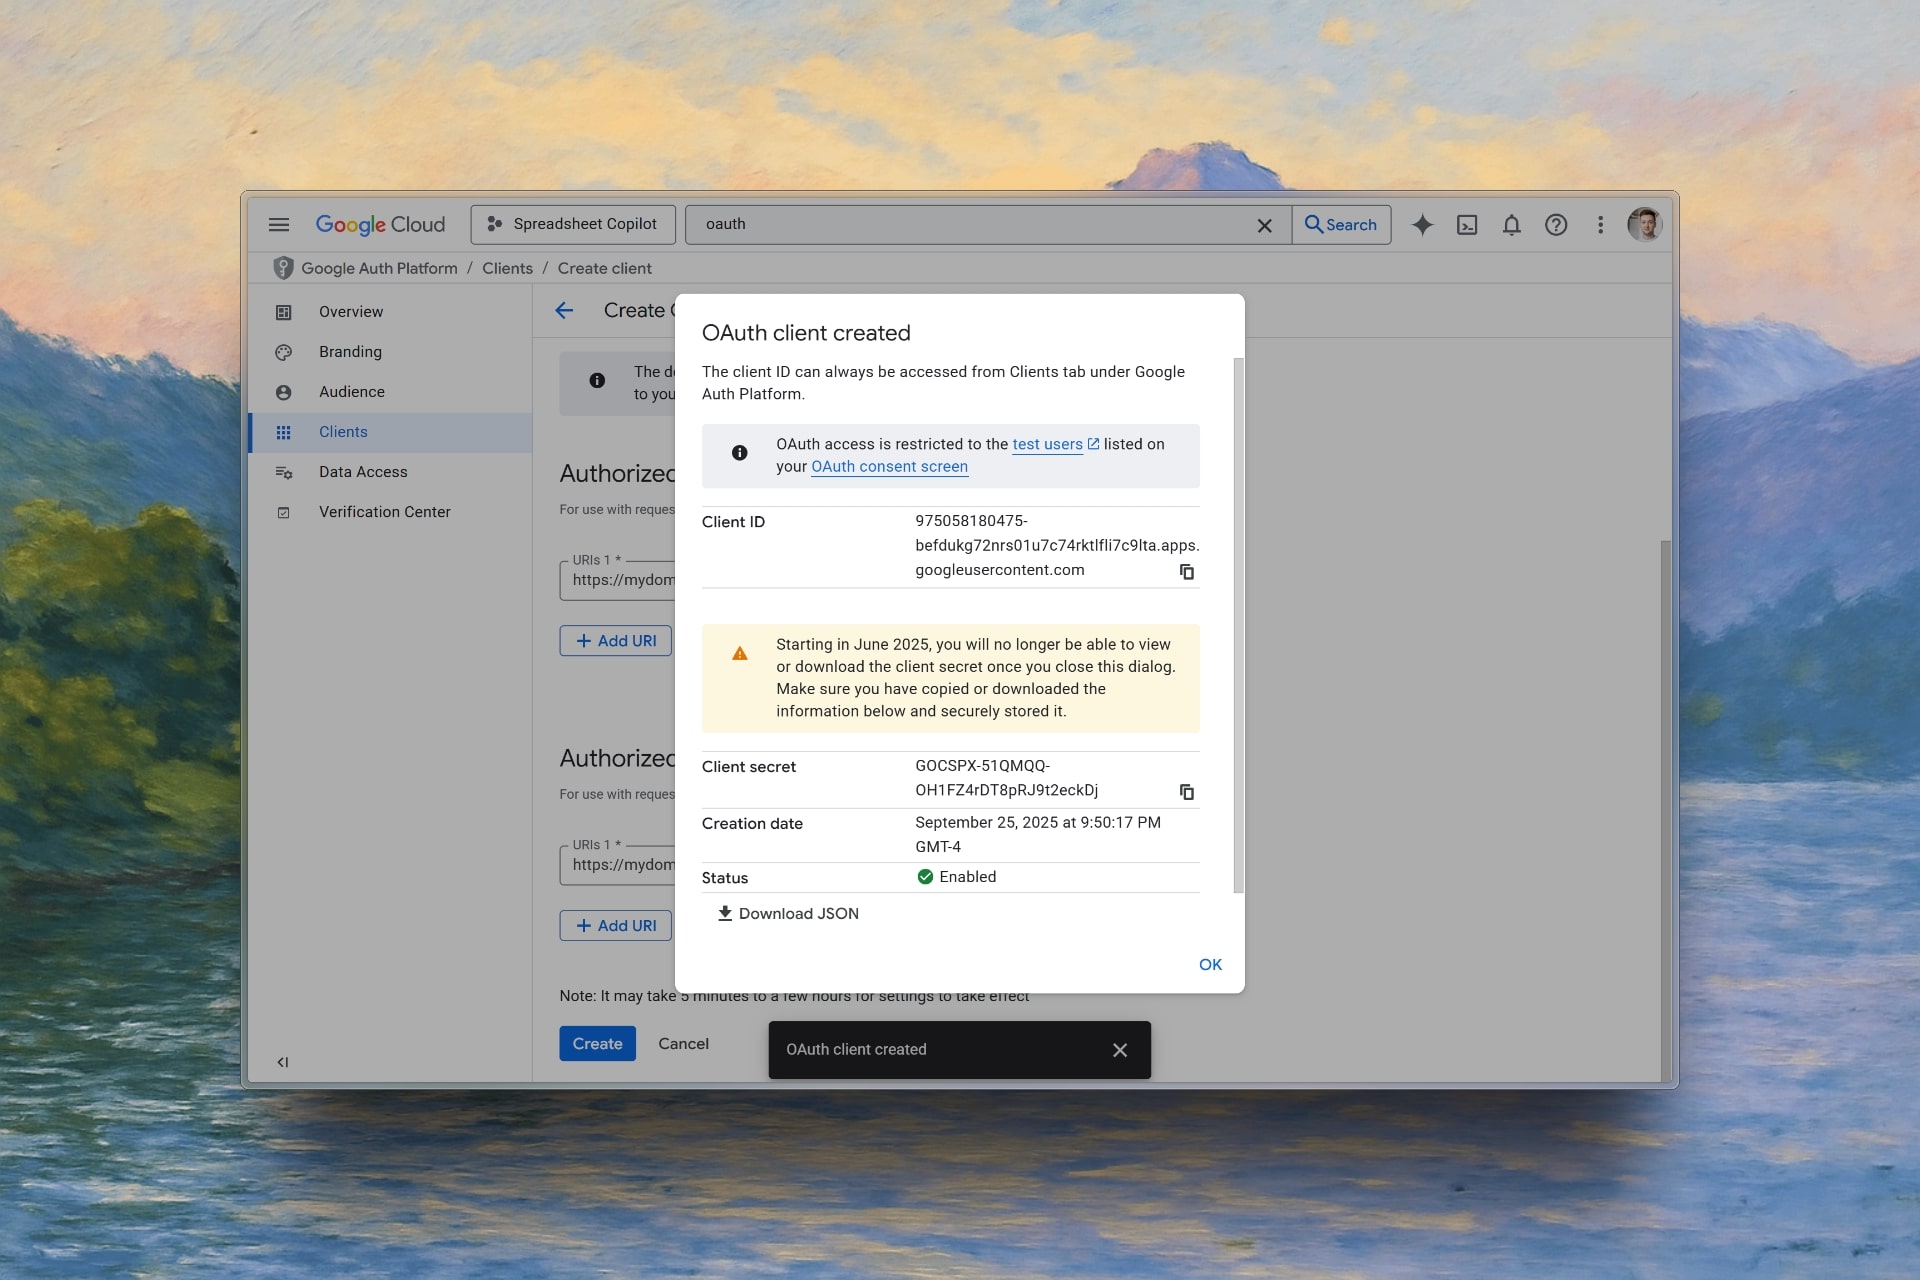
Configure Google OAuth in Kardow
1. Access OAuth Settings
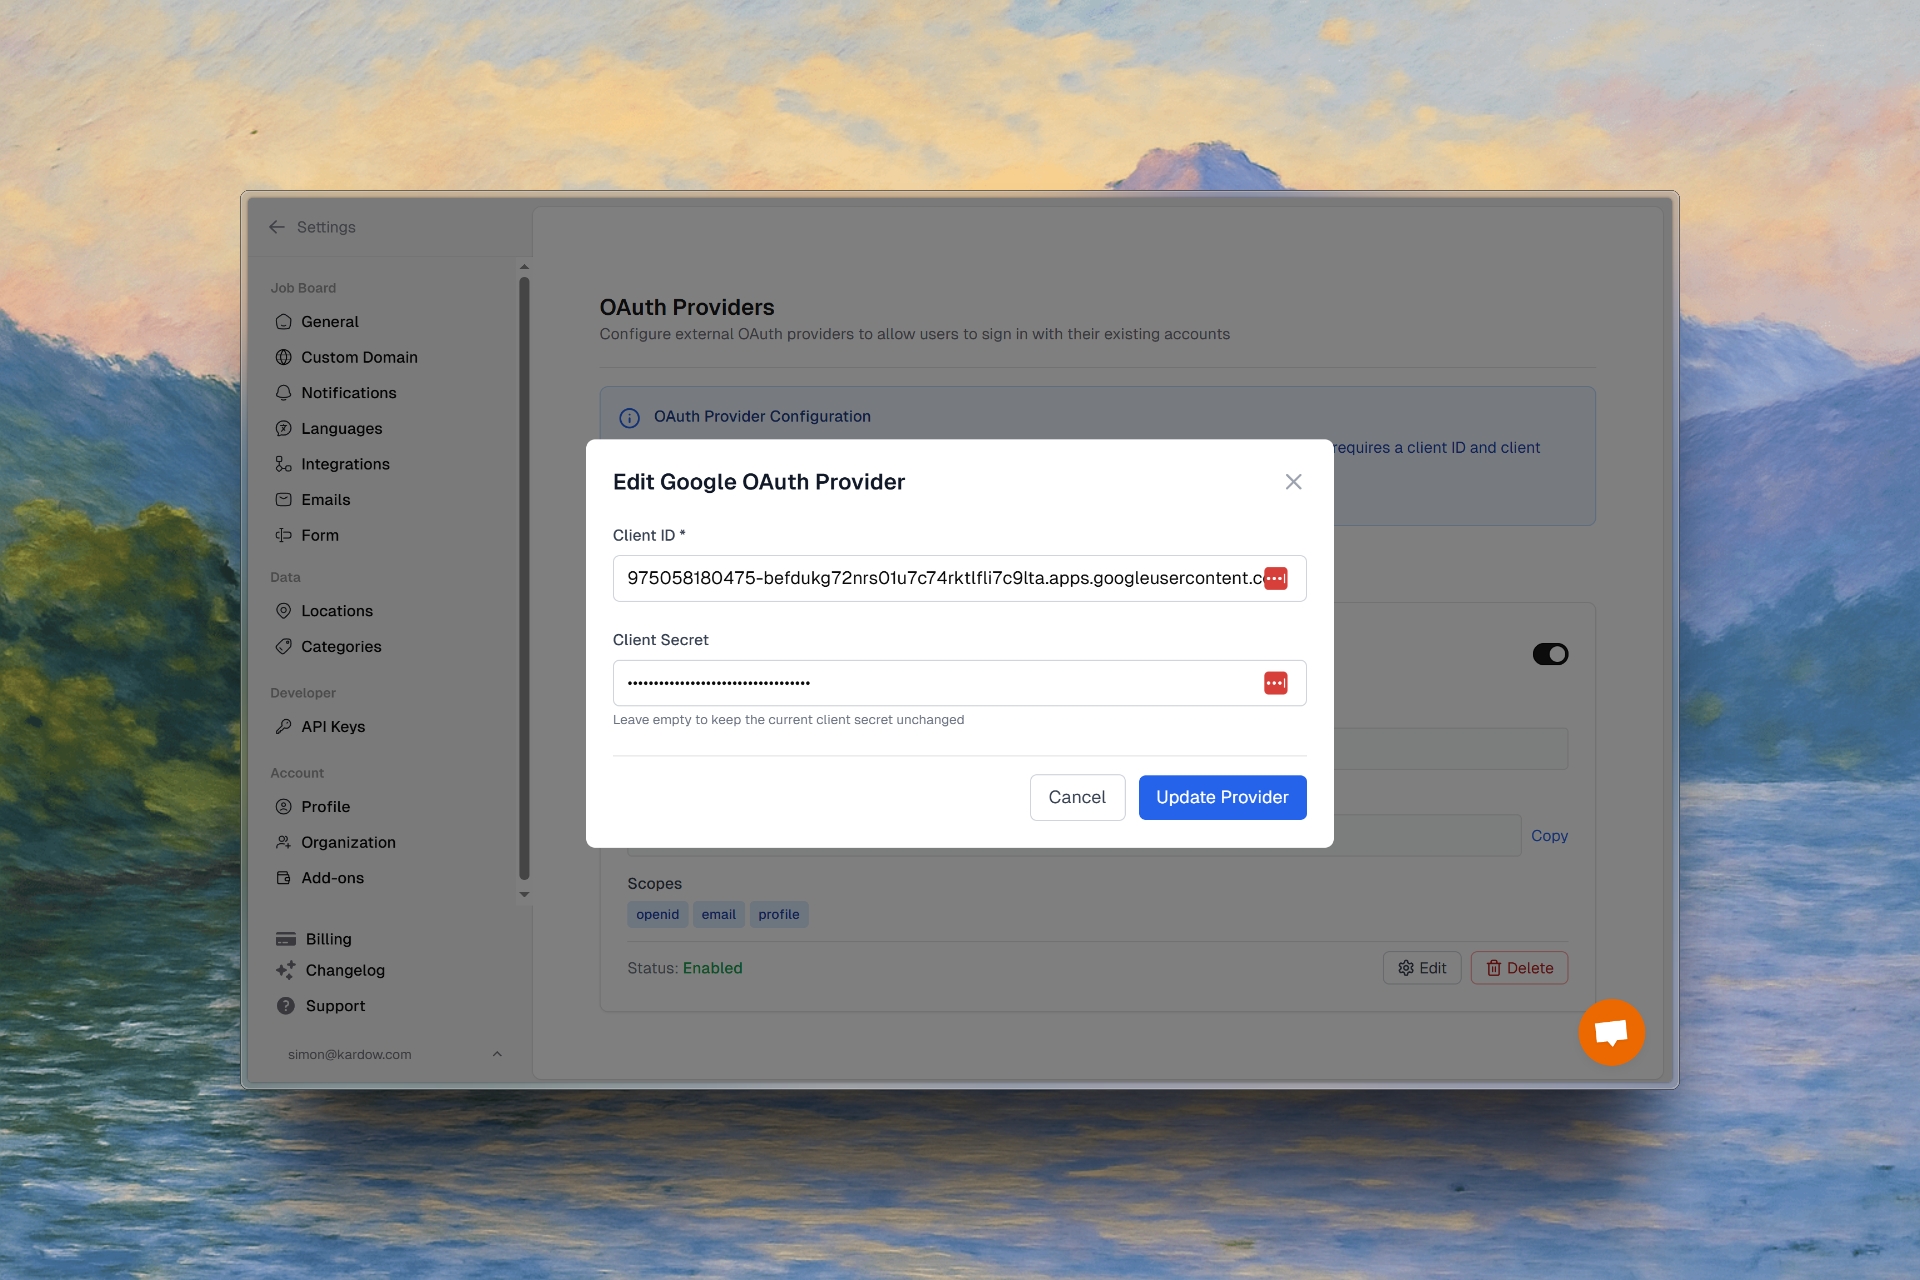
In your Kardow dashboard, navigate to Settings → OAuth.
2. Enable Google OAuth
1
Enable Google OAuth
Toggle on “Google OAuth”
2
Enter Credentials
- Paste your Client ID from Google Cloud
- Paste your Client Secret from Google Cloud
3
Save Settings
Click “Save” to apply your OAuth configuration
Enable Google One Tap (Optional)
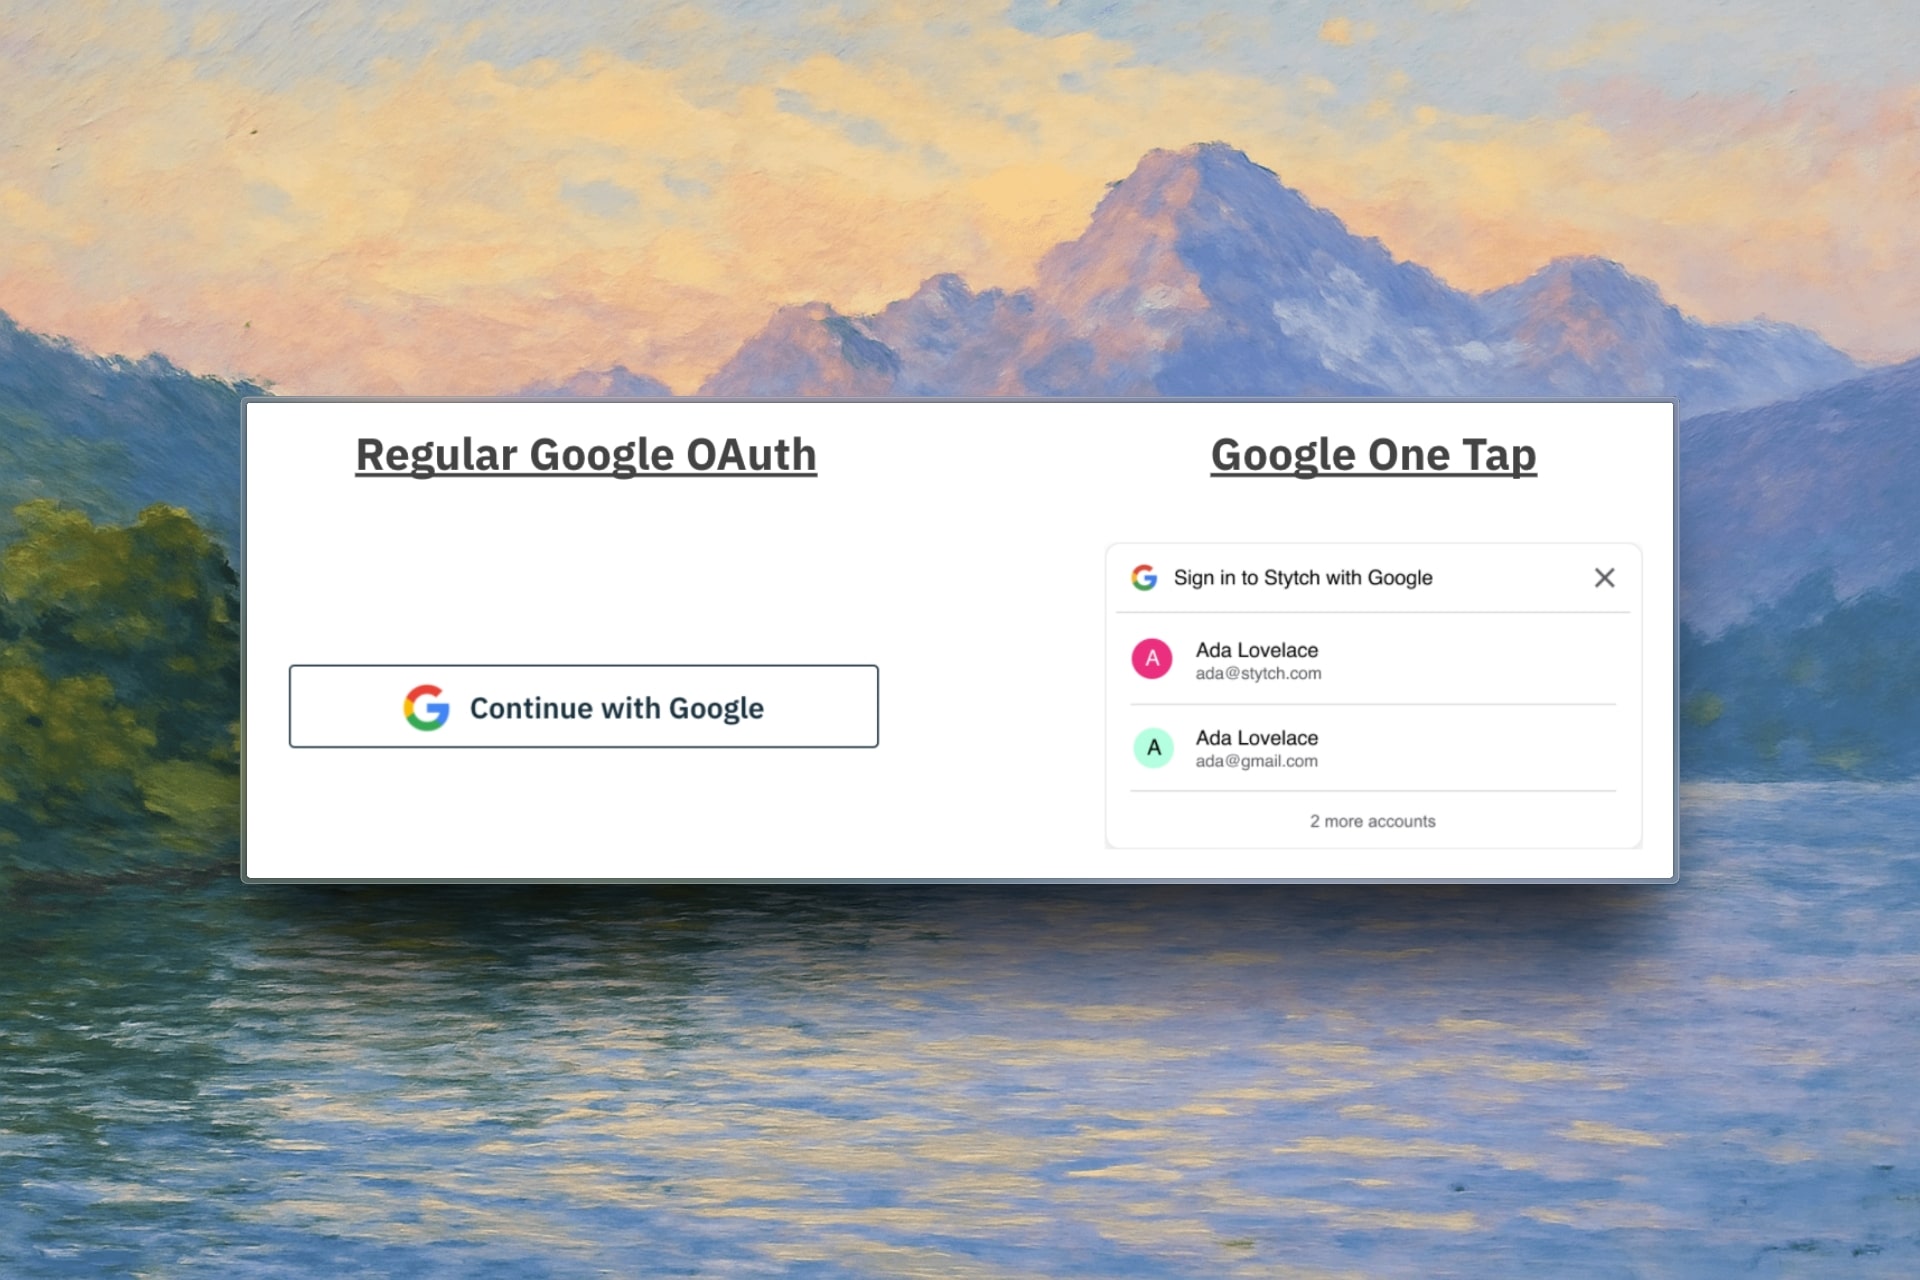
Google One Tap provides a seamless sign-in experience with a popup instead of redirecting users to Google’s login page.One Tap works alongside regular Google OAuth and doesn’t require additional Google Cloud configuration.
Configure One Tap in Kardow
1
Access Settings
Go to your Kardow OAuth settings
2
Enable One Tap
Toggle on “Enable Google One Tap”
3
Save Configuration
Users will now see a Google One Tap popup on your job board
Test Your Setup
1
Visit Your Job Board
Go to your Kardow job board’s login page
2
Click Google Sign-In
Click the “Sign in with Google” button
3
Complete OAuth Flow
Follow the Google authentication process
4
Verify Login
Confirm you’re successfully logged into your job board
Troubleshooting
Common Issues
Redirect URI Mismatch- Ensure your redirect URI in Google Cloud exactly matches:
https://yourdomain.com/oauth/google/callback
- Complete the OAuth consent screen setup for production use
- Verify your Client ID and Client Secret are copied correctly
- Ensure there are no extra spaces or characters